Published on September 7, 2022
Stretch photo (with content-aware scale)
In this blog I’ll show you how to use content-aware scale to stretch a photo without affecting your subject in Adobe Photoshop.
Rather watch the video with instructions? Then click here or scroll down to the end of this page.
Click here if you want to download the image I’m using. Let’s get started!
Step 1: Selection
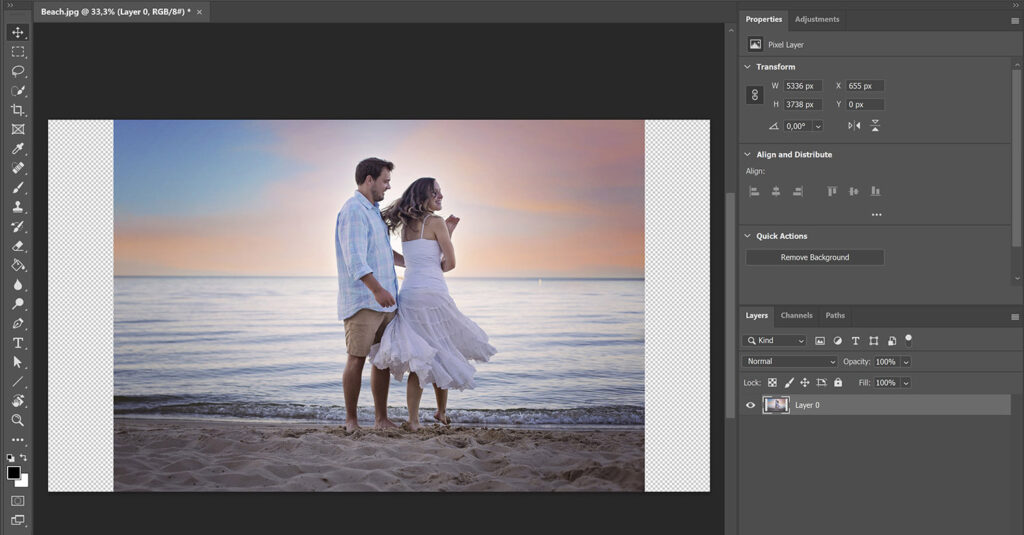
As you can see in the image below, the sides of my photo are transparent now. I’m going to stretch the background to fill these areas, without changing the way the subjects look.

To do that, you first need to select the subject. Navigate to ‘Select > Subject‘. Photoshop will now select your subject.
Once you did that, navigate to ‘Select > Save selection‘. Name your subject and click OK.

After you did that, press CTRL+D to deselect.
Step 2: Stretch photo (content-aware scale)
I will now show you how to stretch the background. Navigate to ‘Edit > Content-aware scale‘.
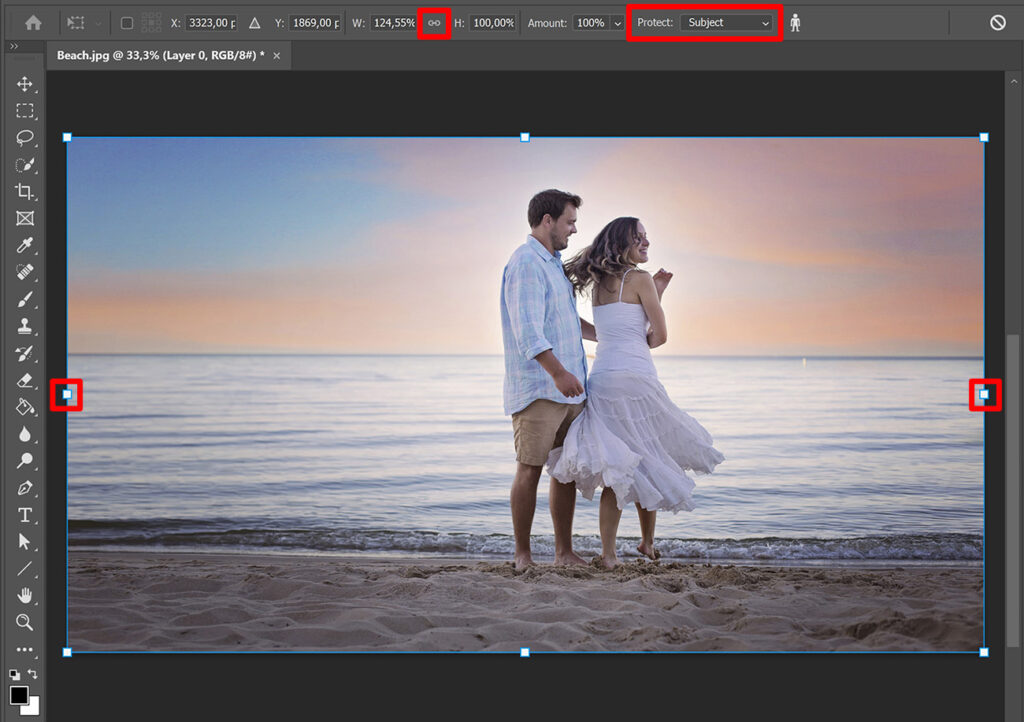
I only want to adjust the width of the background, and not the height. To do that, I disconnect the width and the height by clicking on the chain icon.
Next to protect, pick the selection you just saved. You can now stretch the background by moving the anchor points. You will see that this won’t affect your subject, because you chose to protect this area.

And that’s how you can easily stretch a photo without affecting your subject by using content-aware scale in Adobe Photoshop!
There are more methods you can use to stretch a photo. If you want to know more about that, check out this blog I wrote.
If you want to learn more about editing, you can take a look at the other blogs I wrote about Photoshop and Lightroom or check out my YouTube channel.
Follow me on Facebook to stay updated! You can find the video tutorial below.
Photoshop
Basics
Photo editing
Creative editing
Camera Raw
Neural filters
Text effects

