

Published on April 9, 2023
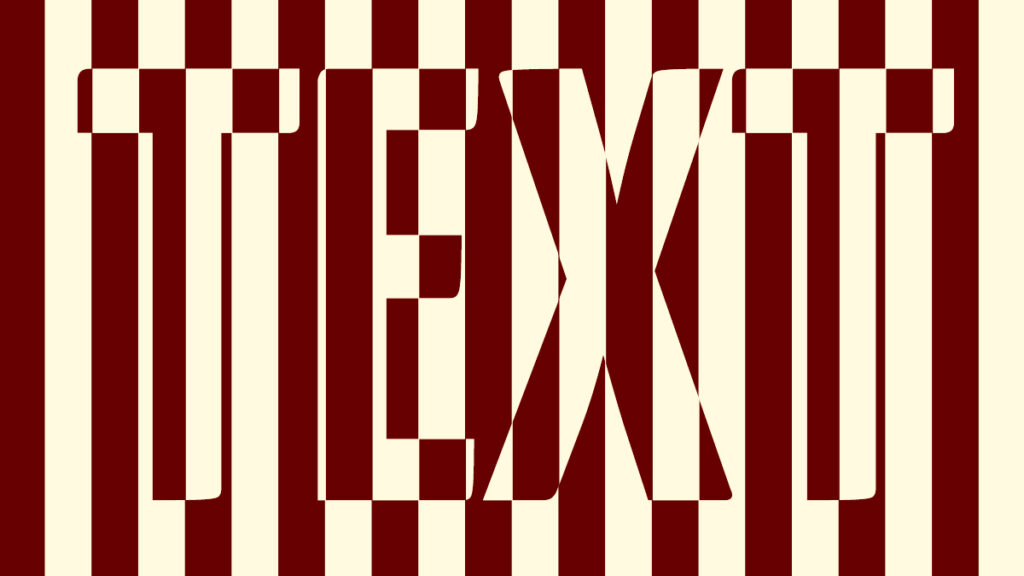
Striped text effect
In this blog I’ll show you how to create a striped pattern to create this two color striped text effect in Adobe Photoshop.
Rather watch the video with instructions? Scroll down to the end of this page or click here to watch the tutorial.
Step 1: Create pattern
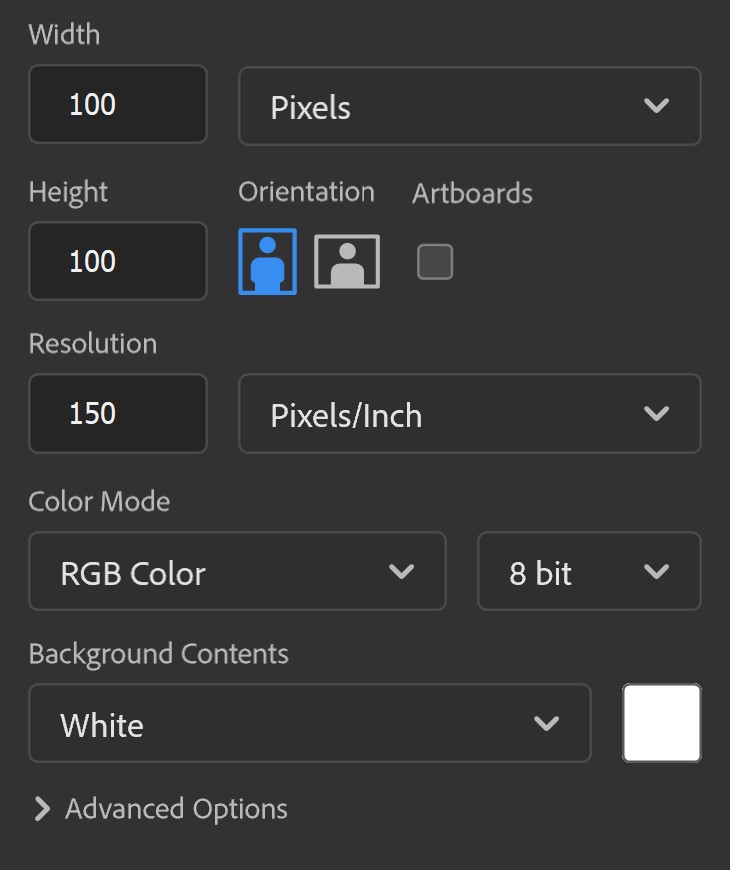
First create a new file. You can find the settings I used in the image below, copy these settings.
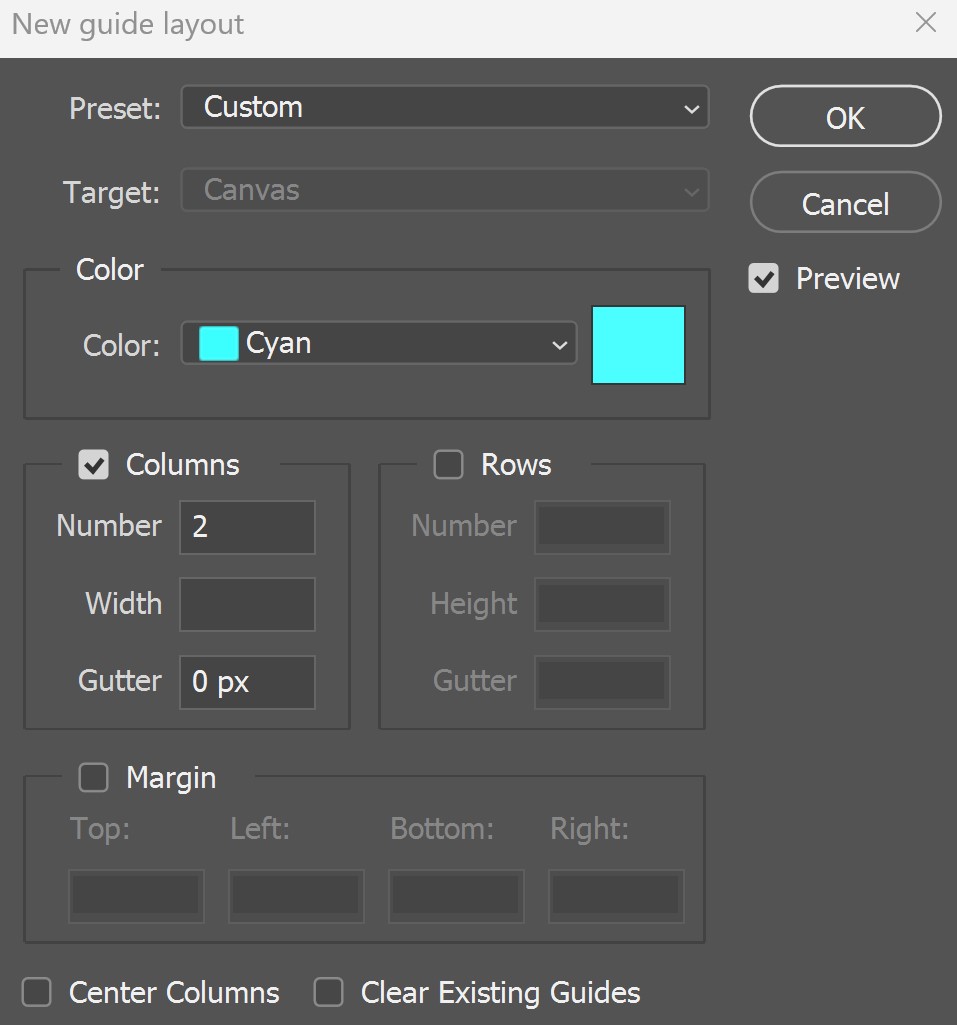
Navigate to ‘View > Guides > New Guide Layout‘. Create 2 columns (and make the gutter 0px).
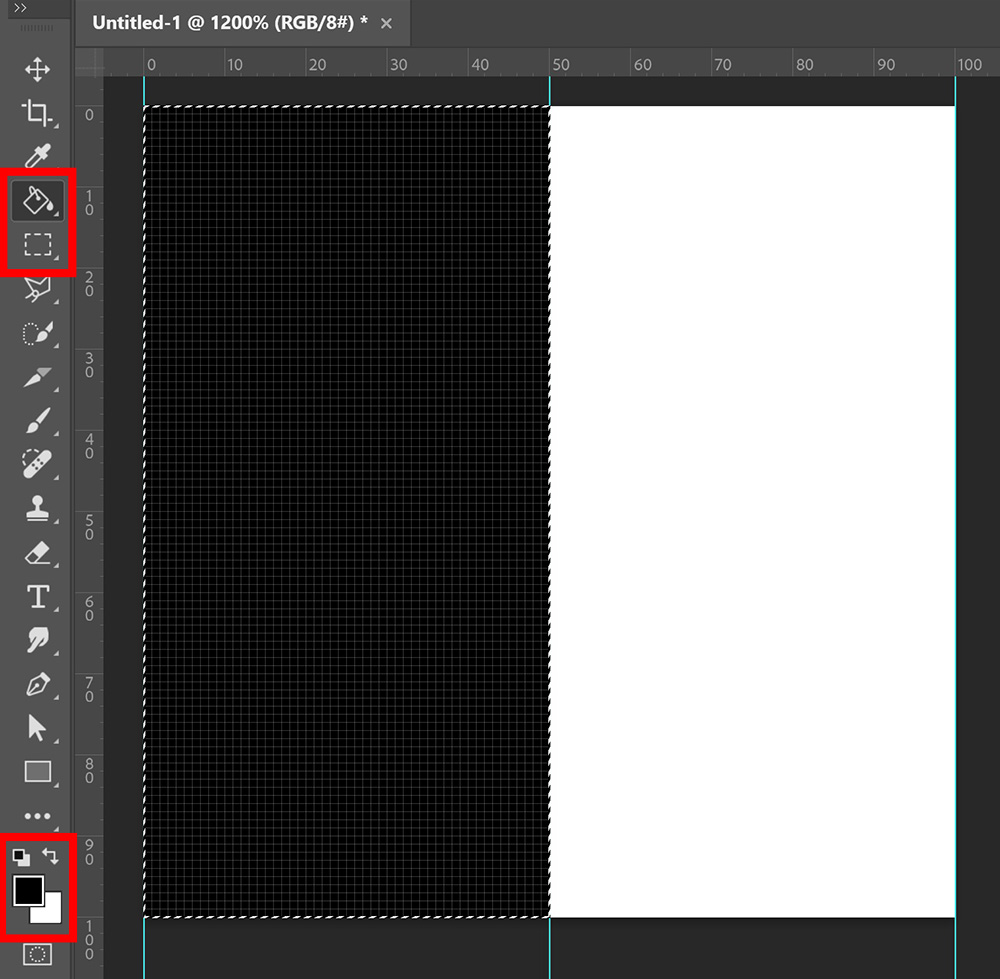
Your canvas is now divided in half. Select the rectangular marquee tool and then select the left half of the canvas.
Make the foreground color black and select the paint bucket tool. Click on the selected (left) half of the canvas to paint it black.
Then press CTRL+D to deselect.
Navigate to ‘Edit > Define pattern‘. Name your pattern and click OK. You have created a striped pattern now. In the next step I’ll show you how to use it!
Step 2: Striped text effect
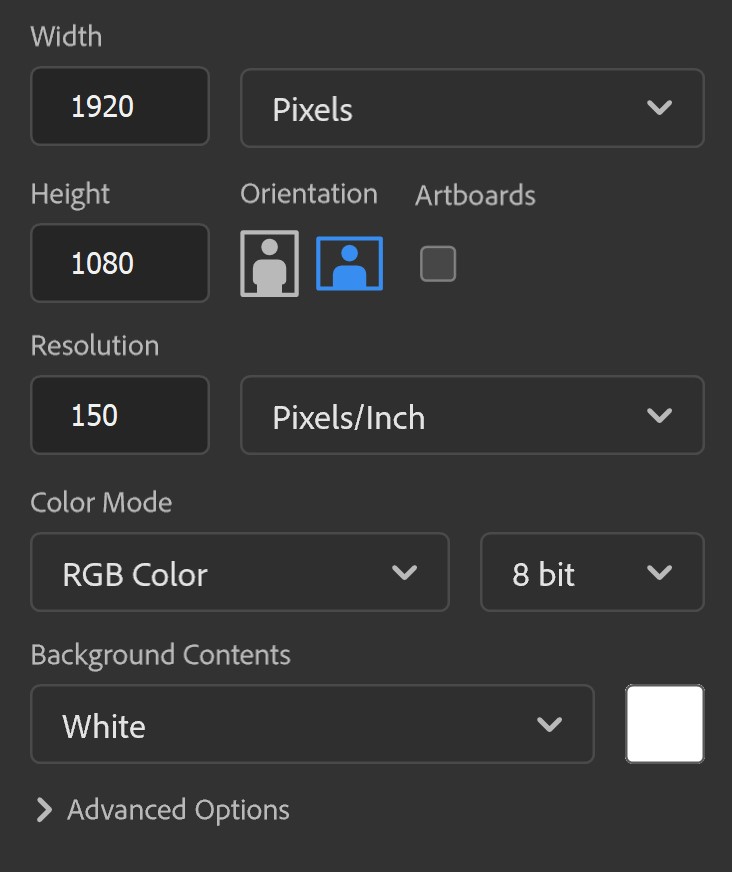
Navigate to ‘File > New‘ (or press CTRL+N). I make my file 1920 x 1080 pixels and I keep the rest of the settings the same. You can also use a different file size, but your stripes might look different then (larger or smaller).
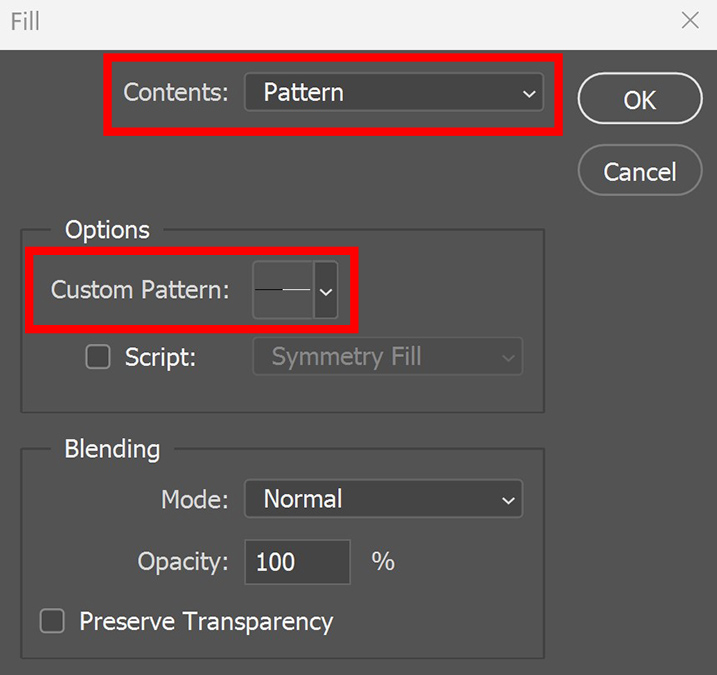
Create a new layer. Then go to ‘Edit > Fill‘.
Select ‘pattern‘ and then select the pattern you’ve just created.
Your canvas is now filled with black and white lines.
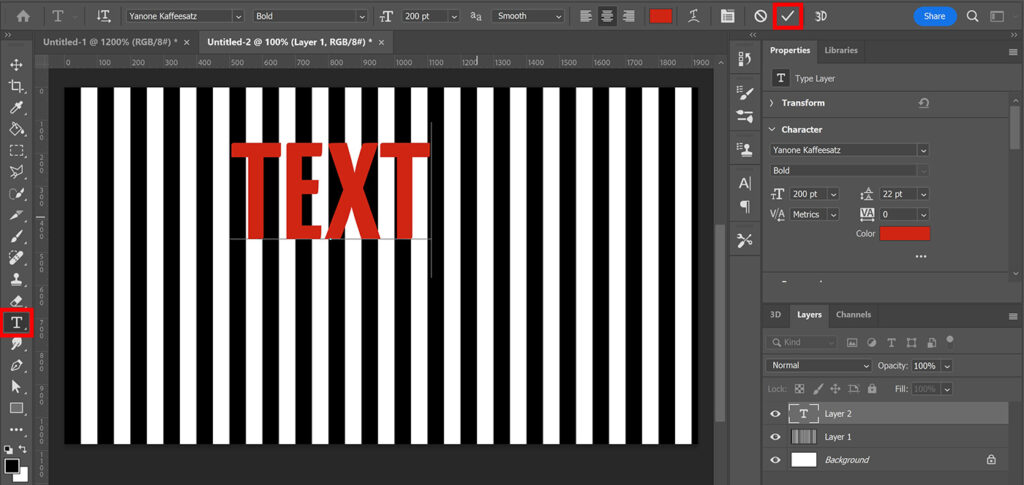
Select the horizontal type tool and pick a font. You can make the text a random color, so you can clearly see it. We’ll fill the text with the striped pattern later, so you won’t see that color.
When you’re done with the text, click on the ✓ icon.
Press CTRL+T to activate free transform. You can now resize and/or move the text.
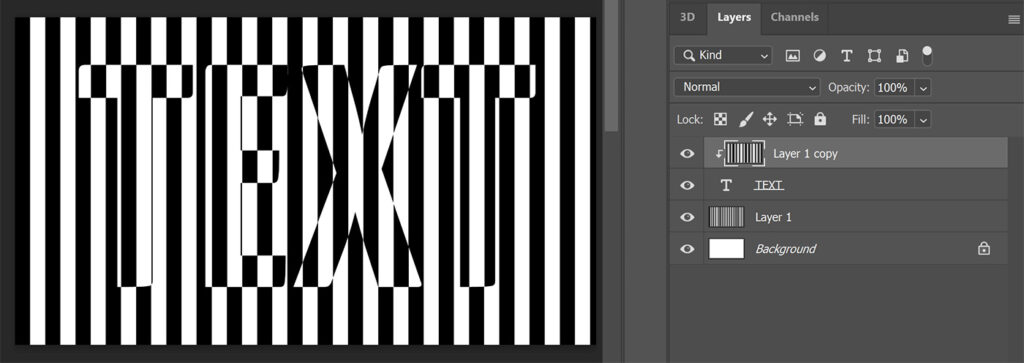
Select the layer with the stripes and press CTRL+J to duplicate it. Then navigate to ‘Image > Adjustments > Invert‘ (or press CTRL+I). The colors of this striped layer are now the opposite of the other striped layer.
Drag this new striped layer above the text layer. Make sure the top striped layer is selected and go to ‘Layer > Create clipping mask‘. You’ve created the striped text effect now!
Step 3: Extra adjustments
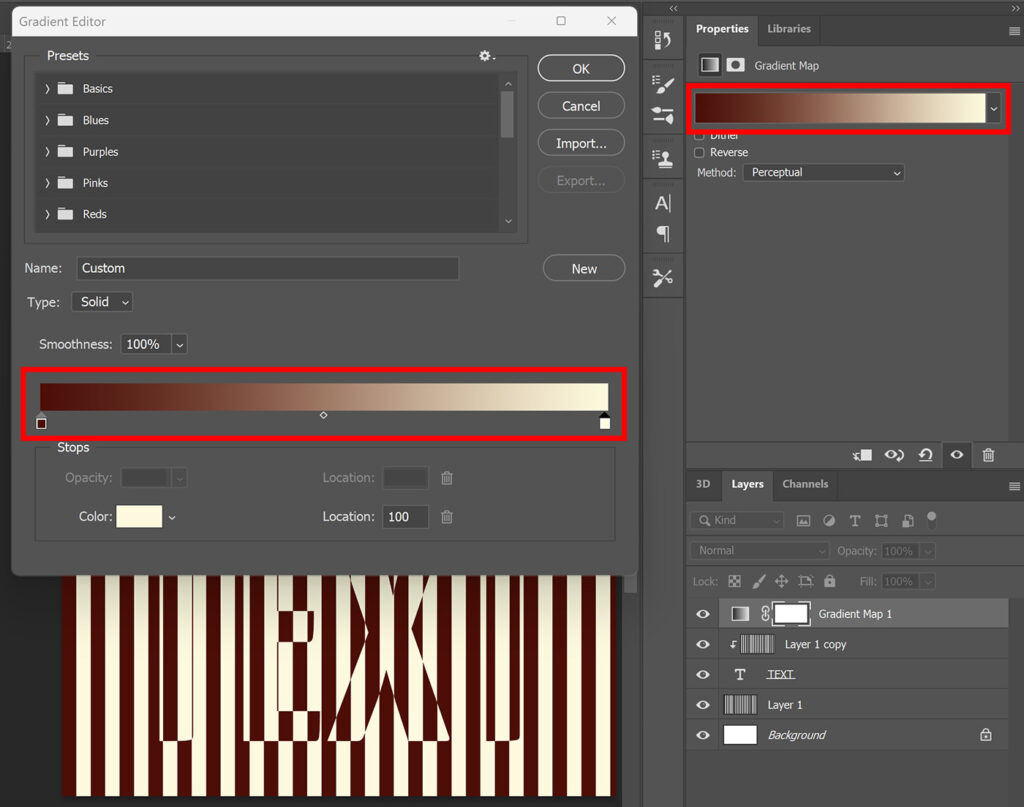
I’ll now show you how to change the color of the stripes.
To do that, create a gradient map layer.
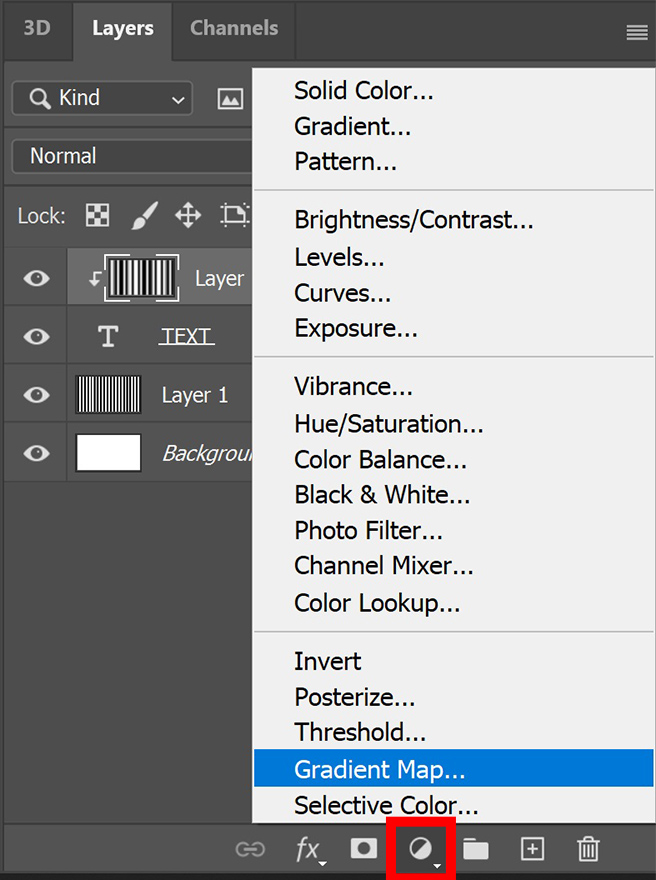
Click on the gradient to change the colors. Adjust the color of the left stop to change the color of the black stripes. To change the color of the white stripes, you adjust the right color stop.
If you want to adjust the size of the stripes, select both the striped layers. Then press CTRL+T and make the layers larger. This will also make the stripes larger.
To move and/or resize the text, select the text layer and again press CTRL+T. You can now change the size and position of the text, this won’t affect the striped effect.
And that’s how you create this striped text effect in Adobe Photoshop!
Learn more about editing in Photoshop
Check out my other blogs or my YouTube channel if you want to learn more about editing in Adobe Photoshop!
Follow me on Facebook to stay updated about new blogs and tutorials! You can find the video with instructions below.
Photoshop
Basics
Photo editing
Creative editing
Camera Raw
Neural filters
Text effects