

Published on June 9, 2023
Text with rough edges (with displacement map)
In this blog I’ll show you a super fast and simple method to create a text with rough edges using a displacement map in Adobe Photoshop!
Rather watch the video with instructions? Then click here or scroll down to the end of this page.
I use an image with paint for the displacement map. You can download that image here. You can also use a different image, but the result will be different then.
Step 1: Preparations
Open the file you want to use (the file with the paint, in this case). Then navigate to ‘File > Save as..‘.
Name your file and then save it as a .PSD file.
Then create a new file (File > New). My file is 1920 x 1080 pixels (resolution 300). You can also pick a background color while creating the file.
Step 2: Text with rough edges (displace)
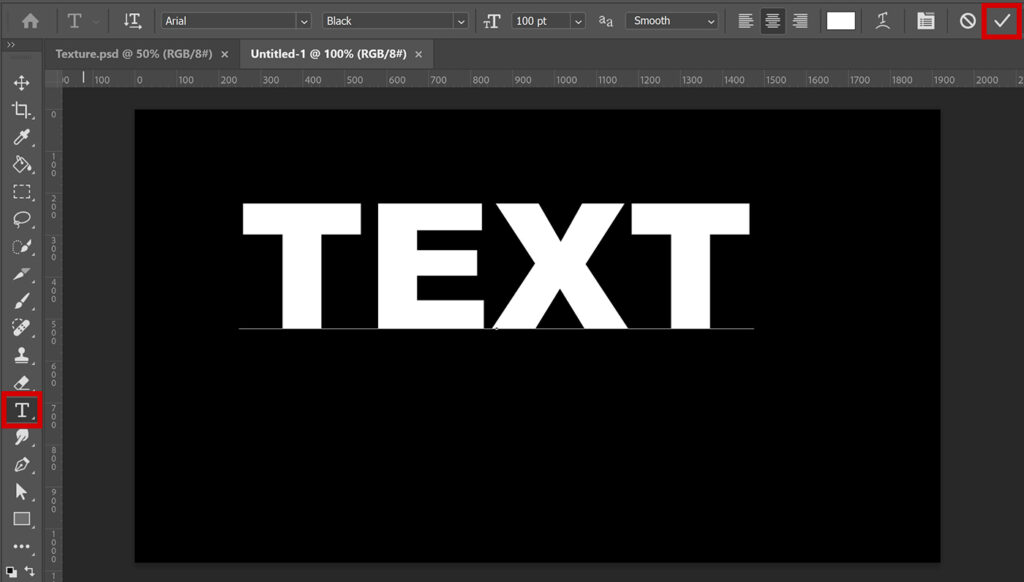
Select the horizontal type tool. Pick a font and text color and type your text.
When you’re done with the text, click on the ✓ icon.
Then press CTRL+T to activate free transform. You can now resize and/or move the text.
Navigate to ‘Filter > Distort > Displace‘. If you get a notification, select ‘convert to smart object’.
You can find the settings I used in the image below. Copy these settings and click OK.
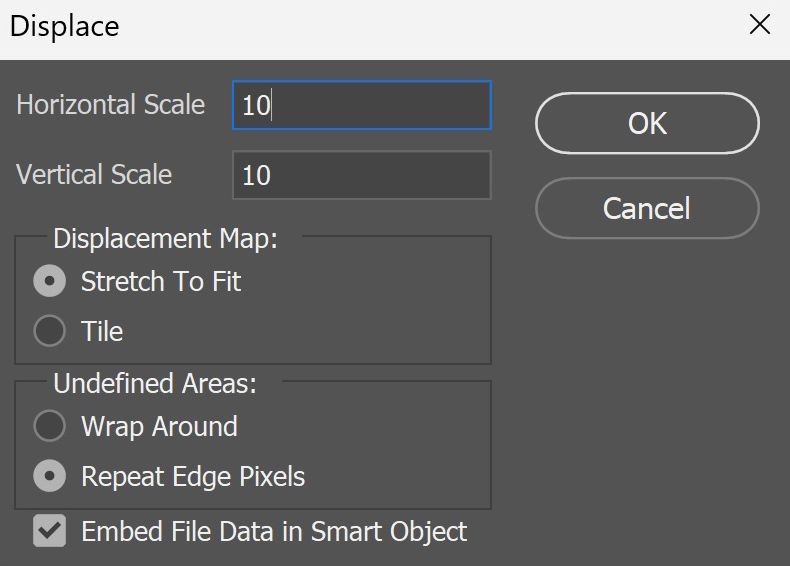
Then select the .PSD file of the paint you just saved. Photoshop will now use this file to distort the text!
And that’s how you create a text with rough edges with a displacement map in Adobe Photoshop.

Learn more about Photoshop
Check out my other blogs and my YouTube channel if you want to learn more about editing in Adobe Photoshop!
You can follow me on Facebook if you want to stay updated about new blogs and tutorials!
Photoshop
Basics
Photo editing
Creative editing
Camera Raw
Neural filters
Text effects