

Published on August 3, 2023
Transform photo into watercolor painting
In this blog I will show you how to transform a photo into a watercolor painting using Generative Fill in Adobe Photoshop (Beta).
Want to watch the video with instructions? Then click here or scroll down to the end of this page.
If you want, you can download the photo I used here.
Step 1: Preparations
First activate the quick mask mode (press Q).

Then navigate to ‘Edit > Fill‘. Select ‘Contents: Color‘ and then pick a gray color. I use the color #676767.
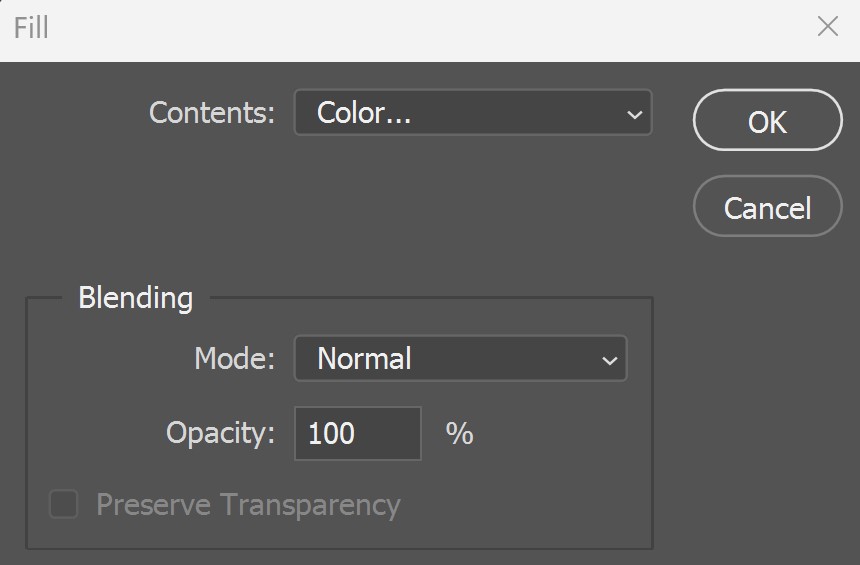
Click OK. Then deactivate the quick mask mode (press Q).
Step 2: Watercolor painting (Generative Fill)
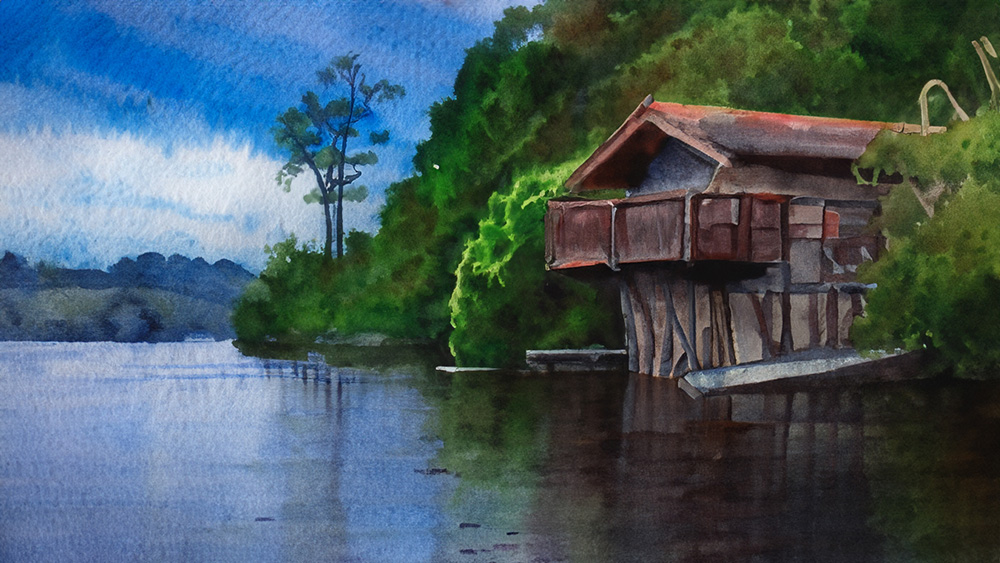
Select Generative Fill. Type in ‘watercolor painting’ and then click on generate.

Photoshop will create different variations of the watercolor painting. Select the one you like the most.
If you don’t like any of them, you can also create more variations by clicking ‘generate‘ again.

And that’s how you turn a photo into a watercolor painting using Generative Fill in Adobe Photoshop Beta.
Learn more about Photoshop
Check out my other blogs or my YouTube channel if you want to learn more about editing in Adobe Photoshop!
You can follow me on Facebook if you want to stay updated about new blogs and tutorials!
Photoshop
Basics
Photo editing
Creative editing
Camera Raw
Neural filters
Text effects