

Published on July 27, 2023
Stretch or extend background
In this blog I will show you a super fast and simple method to extend a background with Generative Fill in Adobe Photoshop (Beta).
Rather watch the video with instructions? Then click here to open the video or scroll down to the end of this page.
You can download the photo I used here.
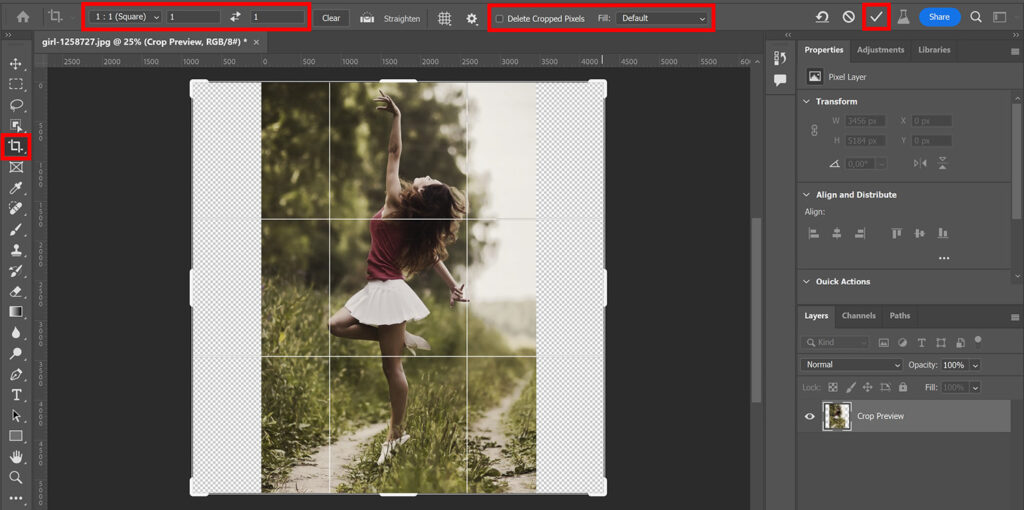
Step 1: Change ratio
Select the crop tool and pick a new ratio. I use the square 1:1 ratio.
Deselect ‘Delete cropped pixels‘ and select ‘Fill: Default‘. Then click on the ✓ icon.
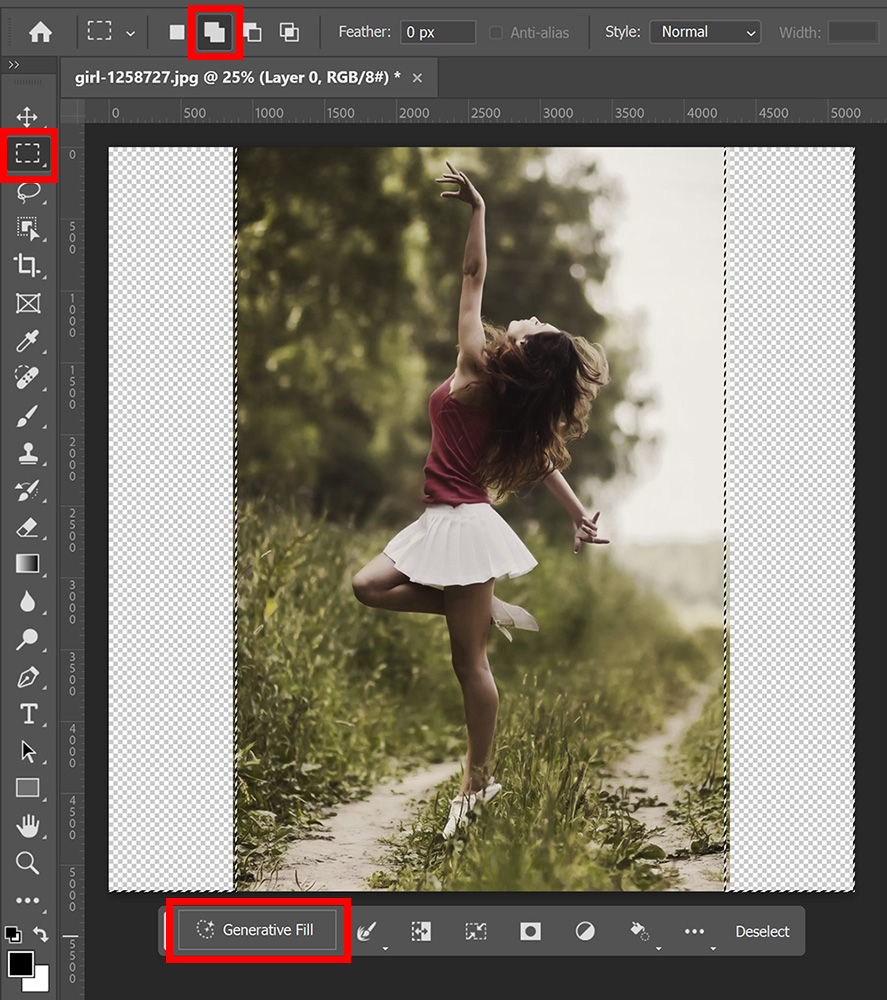
Step 2: Extend background
Now select the rectangular marquee tool and select ‘add to selection‘.
Select both the transparent areas. Then click on ‘generative fill‘.
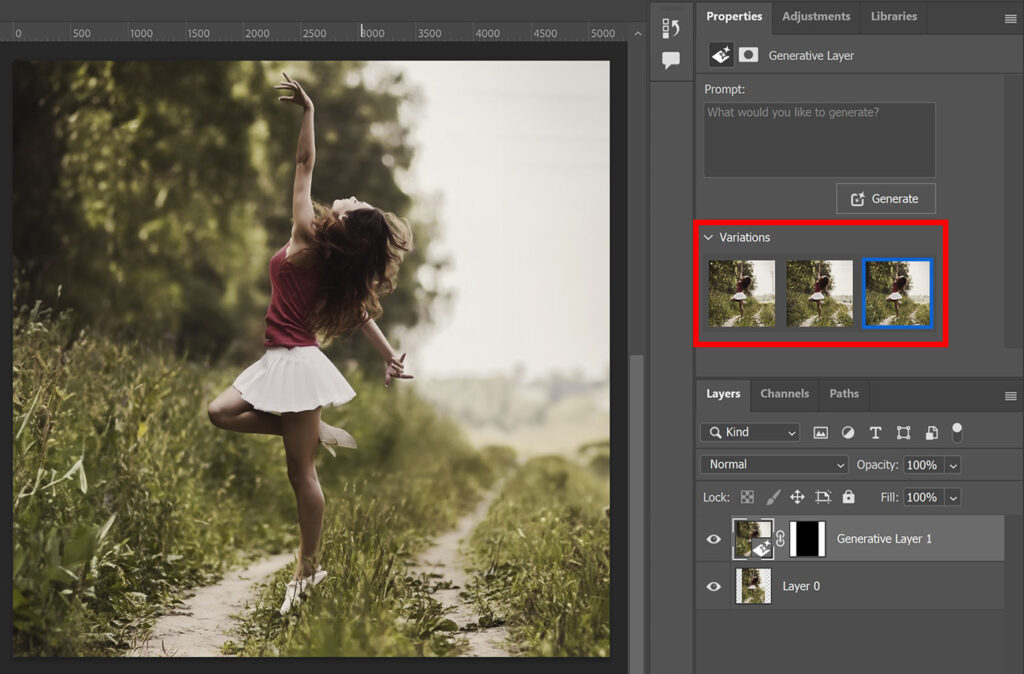
Then select ‘generate‘. You can leave the ‘what would you like to generate?’ field empty.

Photoshop will now fill the selected transparent areas. You get several variations to choose from, select the one that looks best.
And that’s how you expand a photo in Adobe Photoshop (Beta) using Generative Fill.

Learn more about Photoshop
Check out my other blogs or my YouTube channel if you want to learn more about editing in Adobe Photoshop!
You can follow me on Facebook if you want to stay updated about new blogs and tutorials!
Photoshop
Basics
Photo editing
Creative editing
Camera Raw
Neural filters
Text effects