
Published on August 6, 2023
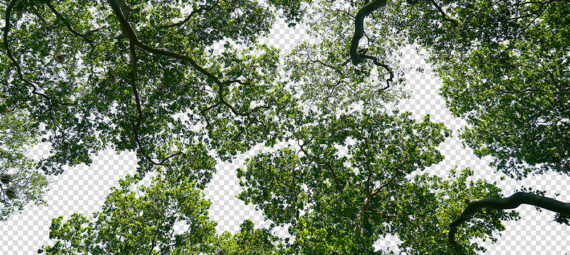
Remove sky behind trees
In this blog I will show you a very simple trick to remove the sky behind a tree in Adobe Photoshop.
Rather watch the video with instructions? Then click here or scroll down to the end of this page.
You can download the photo I used here.
Remove sky (transparent background)
Open the photo you want to edit. Then unlock the background layer (click on the lock icon).
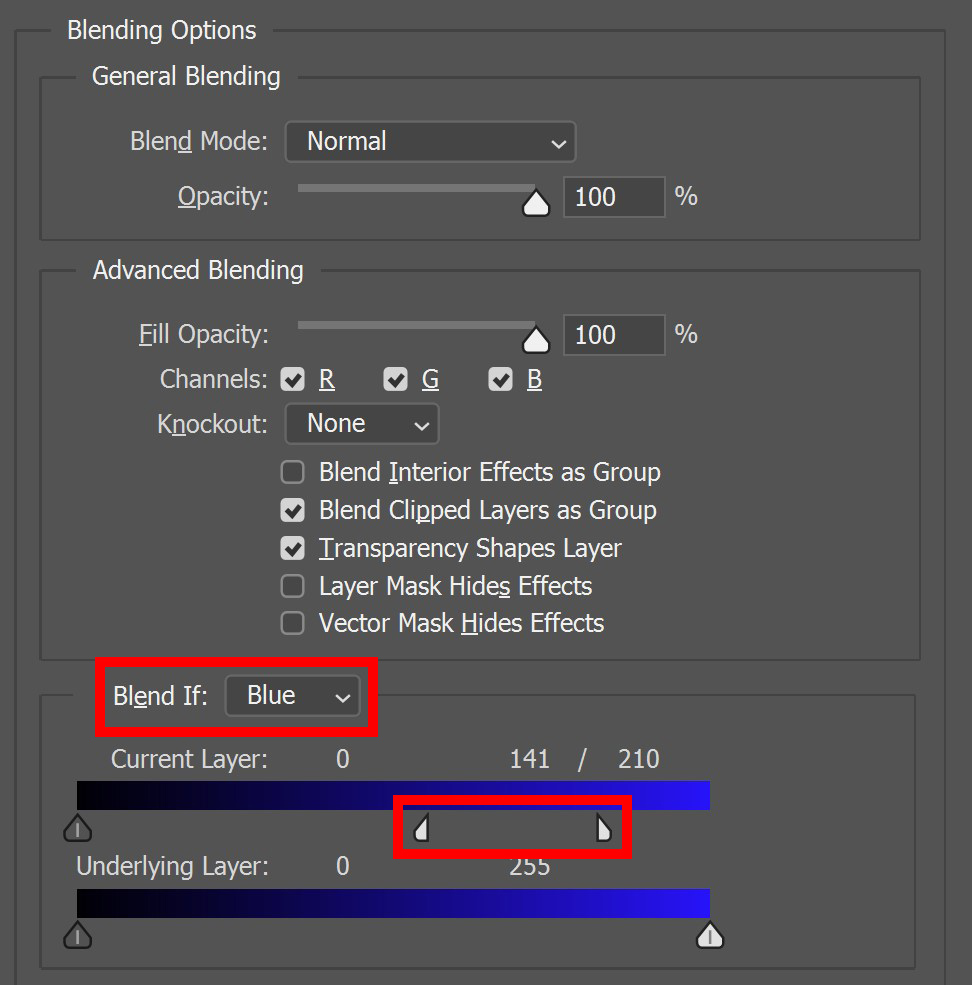
When you’ve unlocked the background layer, click on the fx icon below your layers and select ‘blending options‘.
Select ‘Blend if: Blue‘. Under current layer, move the right slider to the left. You will see that the sky now becomes transparent.
Press and hold ALT and click on the slider to split it in two parts. You can now move both of these parts individually to remove the sky more precisely. Move the sliders until the entire background is transparent.
And that’s how you remove the sky behind a tree in Adobe Photoshop!

I now showed you how to remove the sky with blending options, but you can also use channels to do this. Want to know more about this method? Then read this blog I wrote about that.
Learn more about Photoshop
Check out my other blogs and my YouTube channel if you want to learn more about editing in Adobe Photoshop!
You can follow me on Facebook if you want to stay updated about new blogs and tutorials!
Photoshop
Basics
Photo editing
Creative editing
Camera Raw
Neural filters
Text effects