Published on April 7, 2024
Wave text effect
In this blog I will show you a super fast and simple method to create a wavy text in Adobe Photoshop.
Rather watch the video with instructions? Click here to open the YouTube video or scroll down to the end of this page.
Wavy text
First create a new file. My file is 1920×1080 pixels (resolution 72). You can also pick a background color while creating the file.
Then select the horizontal type tool. Pick a font and text color and type your text.
When the text is done, select the move tool. Press CTRL+T to activate free transform. You can now resize and/or move the text.
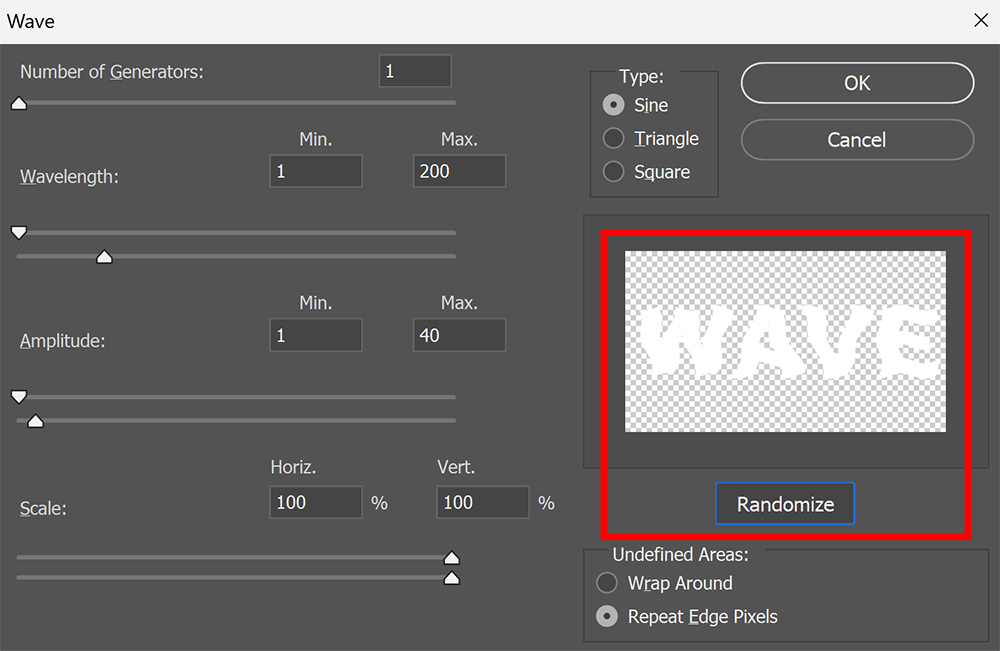
Now navigate to ‘Filter > Distort > Wave‘. If you get a notification, select ‘convert to smart object‘. You can find the settings I used in the image below. You can copy these settings, but you can also try out different settings.
Click ‘randomize’ until you find an effect you like. Look at the preview above it to see what the wave effect looks like.

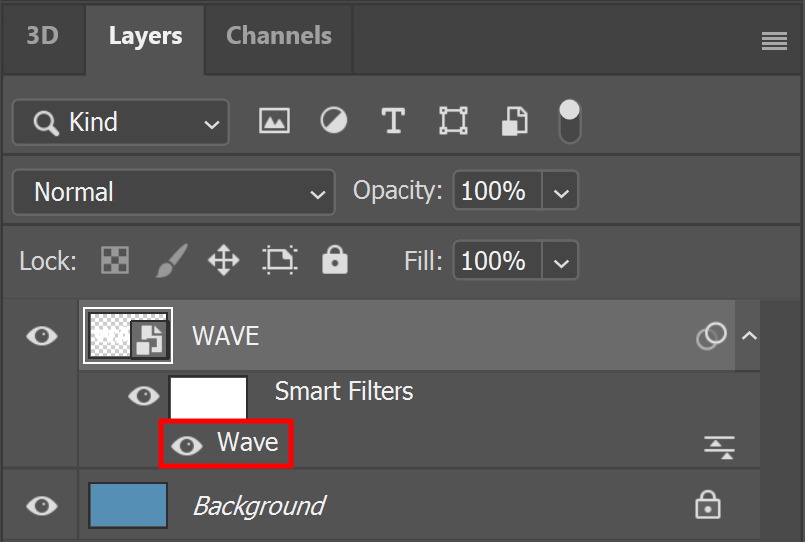
If you want to adjust the settings, you can do this at any time because you converted the text into a smart object. Double click on the ‘wave’ layer to do this. The window shown in the image above will then open again and you can adjust the settings.

And that’s how you create this wave text effect in Adobe Photoshop!

Learn more about Photoshop
Do you want to learn more about editing in Adobe Photoshop? Check out my other blogs or my YouTube channel!
You can follow me on Facebook if you want to stay updated about new blogs and tutorials!
Photoshop
Basics
Photo editing
Creative editing
Camera Raw
Neural filters
Text effects

