
Published on December 14, 2021
Wrap text around subject in Photoshop
In this blog I’ll explain how to wrap a text around your subject in Adobe Photoshop.
If you’d rather watch the video tutorial of this process, click here or scroll down to the end of this page. To download the image I used, click here.
Step 1: Selection
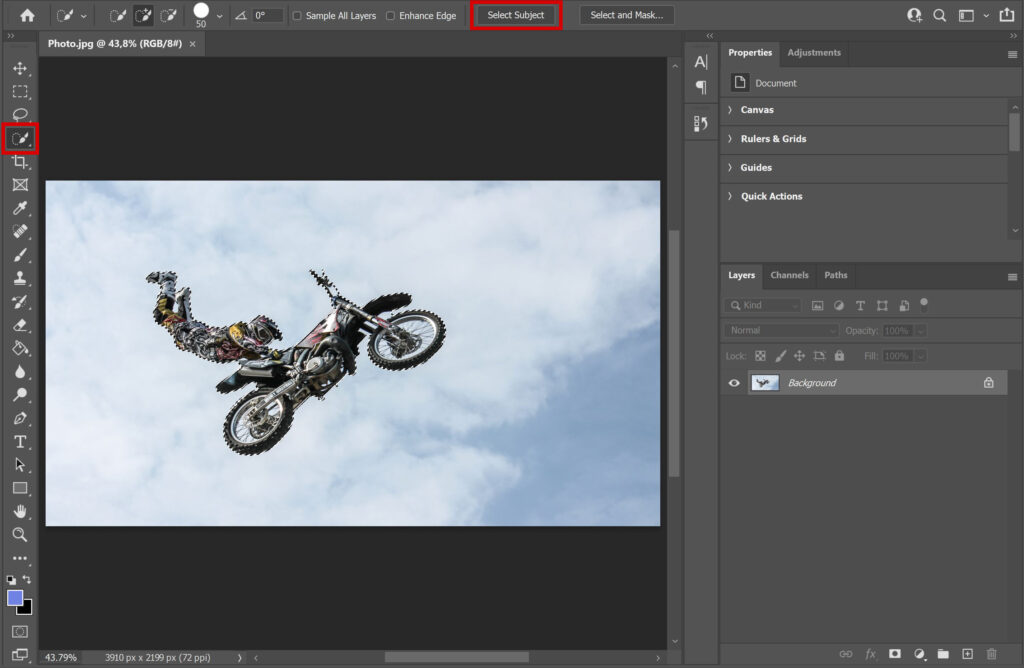
Use the quick selection tool to select your subject.
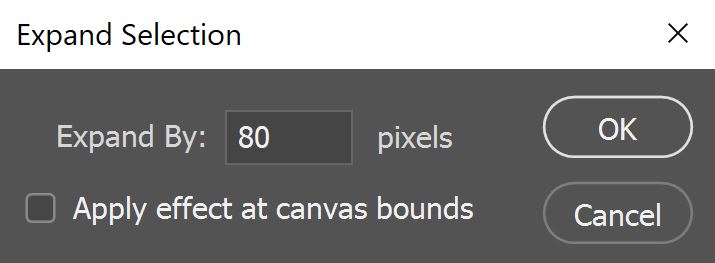
Navigate to ‘select > modify > expand‘. I expand my selection by 80 pixels. The amount of pixels you need to use, depends on the size of your image. There should be some space between your subject and the selection (because the text will be around the selection and you don’t want it to be too close to your subject). So if 80 pixels doesn’t work well for your image, undo the last action (CTRL+Z) and try it again with a different amount of pixels.
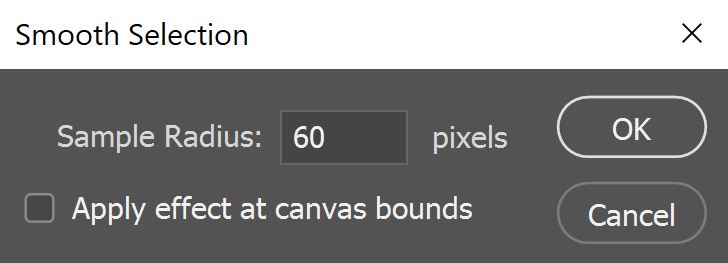
Then navigate to ‘select > modify > smooth‘. I use a sample radius of 60 pixels.
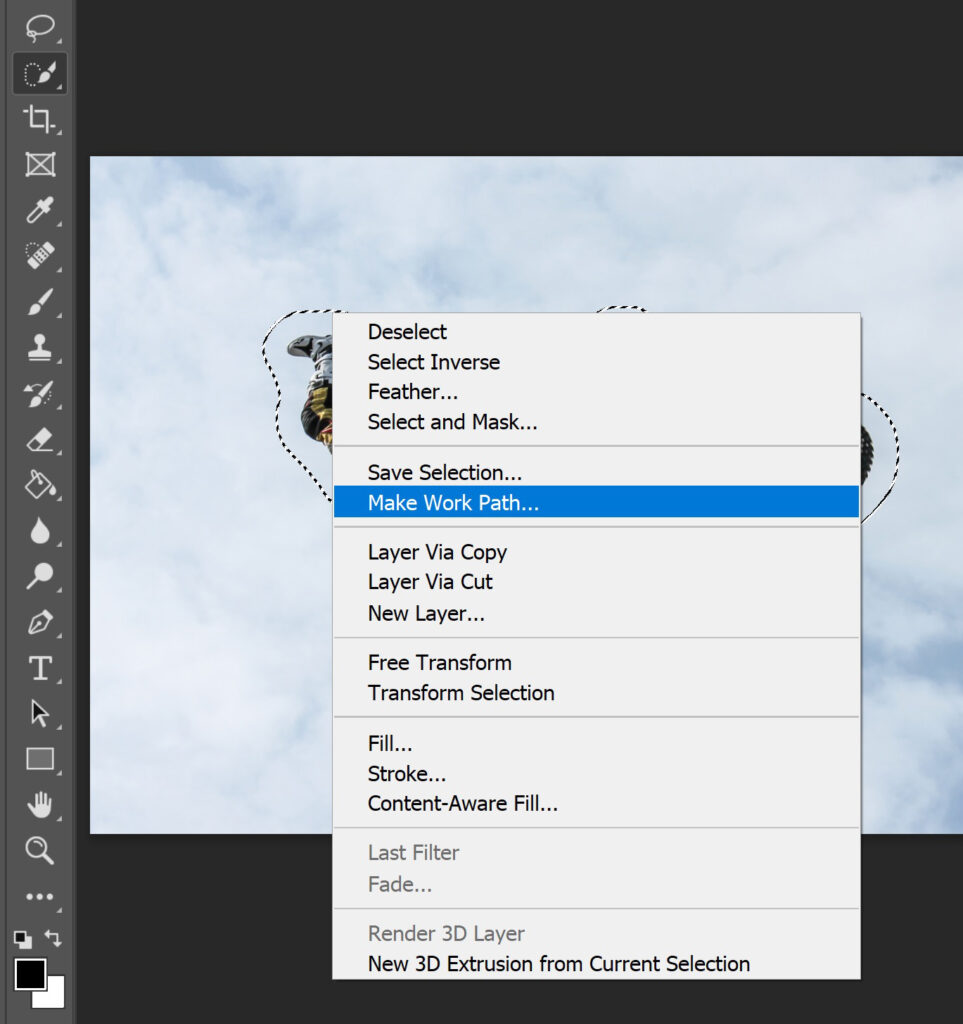
With the quick selection tool selected, right click on the selection and select ‘make work path‘. I leave the tolerance at 1,0 pixels.
Step 2: Wrap text
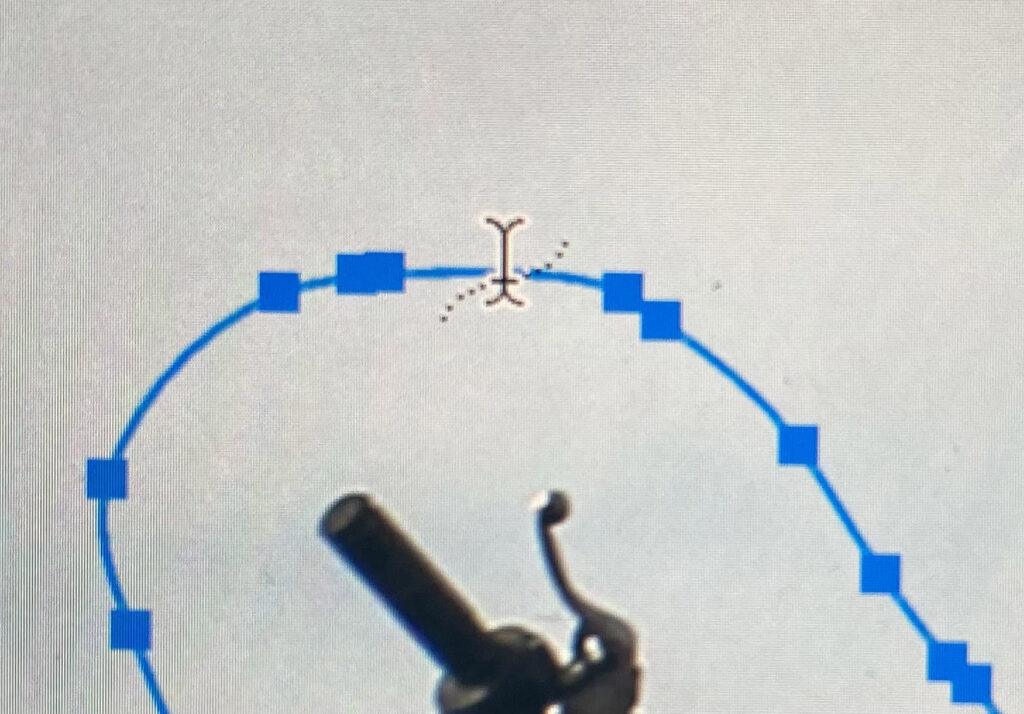
Select the horizontal type tool and pick a font you like. If you hover over your work path, you can see that your cursor changes. When you see this wavy icon next to your cursor, it means you can type on your work path. So click here and type or paste your text.
Now fill the entire path with text. To do that, select your text (CTRL+A), copy the text (CTRL+C) and paste the text (CTRL+V) untill you almost filled the entire path.
If you don’t want a half sentence at the end, adjust the font size to make it fit. Your letters might be too close together in the corners (which makes them overlap). Make the tracking bigger to fix that.
Tip: To adjust the font size and tracking, select the number next to it. Instead of typing in a new amount, use the arrow up and down keys to make it larger or smaller. This way you can choose exactly the right size.
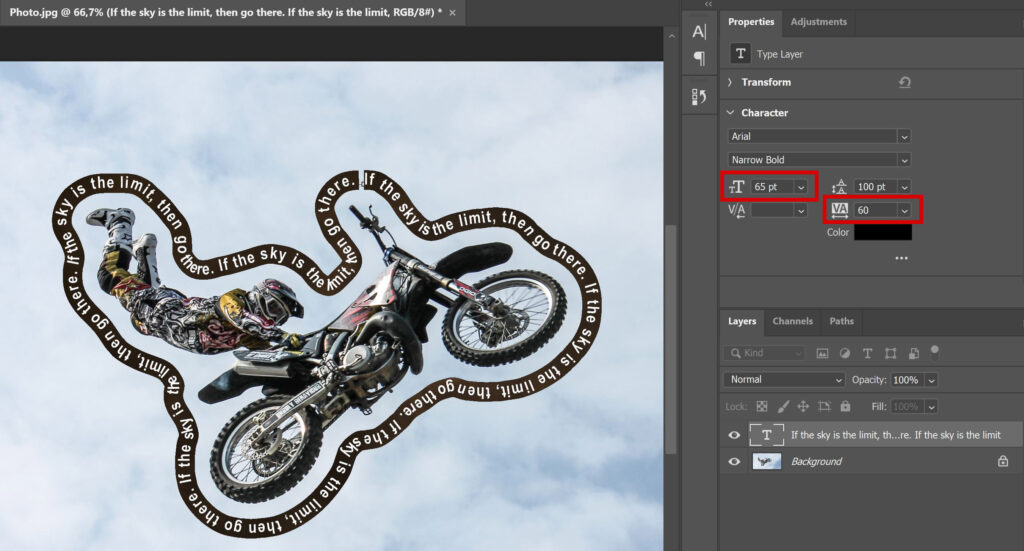
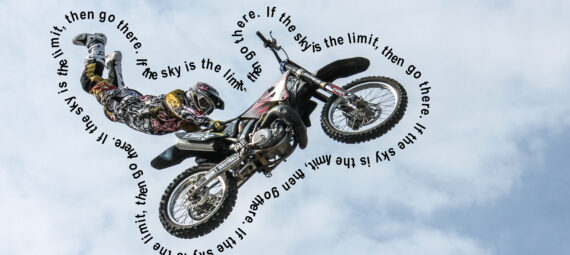
Some letters might still overlap because they’re in a sharp angle. As you can see in the image below, that’s the case with the word ‘limit’. To fix that, place your cursor in front of this word and press the space bar. Adding some extra space in front of the word might help to get it out of that weird angle. Be aware that adding an extra character makes the text longer. You might have to make your text a little smaller to make sure it still fits.
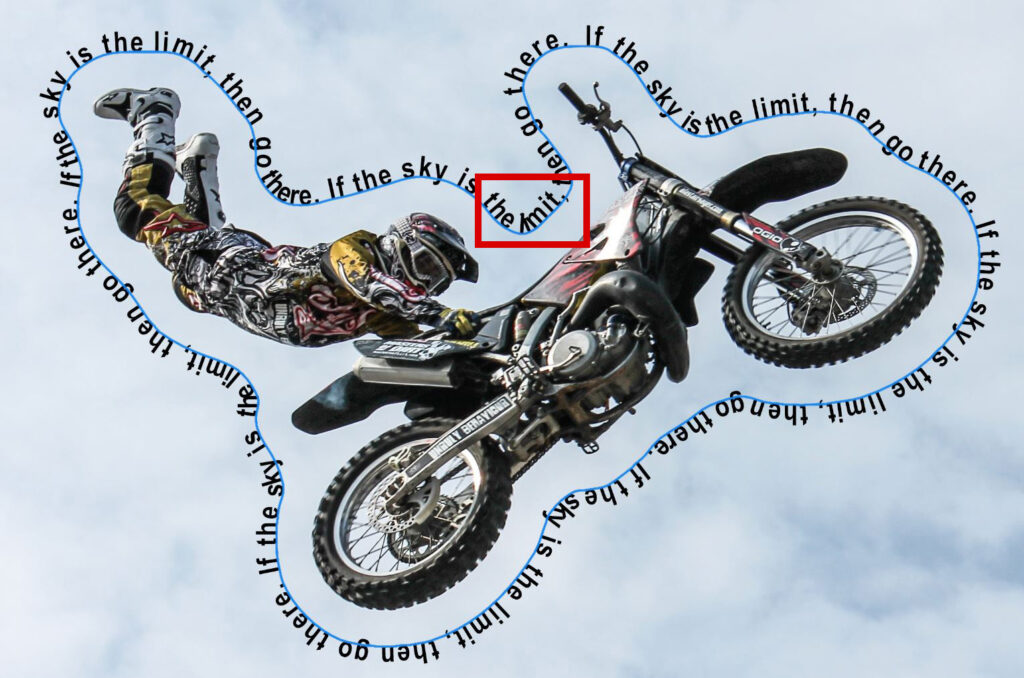
And that’s how you wrap text around a subject! Want to learn more about Adobe Photoshop? Check out my other blogs or take a look at my YouTube channel. You can find the video tutorial below!
Photoshop
Basics
Photo editing
Creative editing
Camera Raw
Neural filters
Text effects