
Published on October 9, 2022
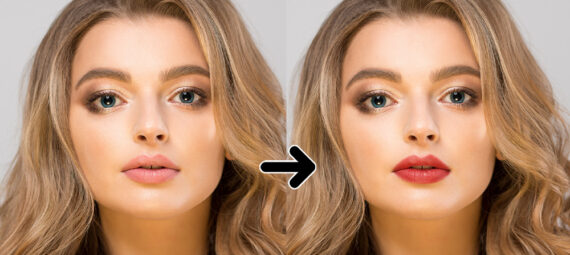
Add lipstick (change lip color)
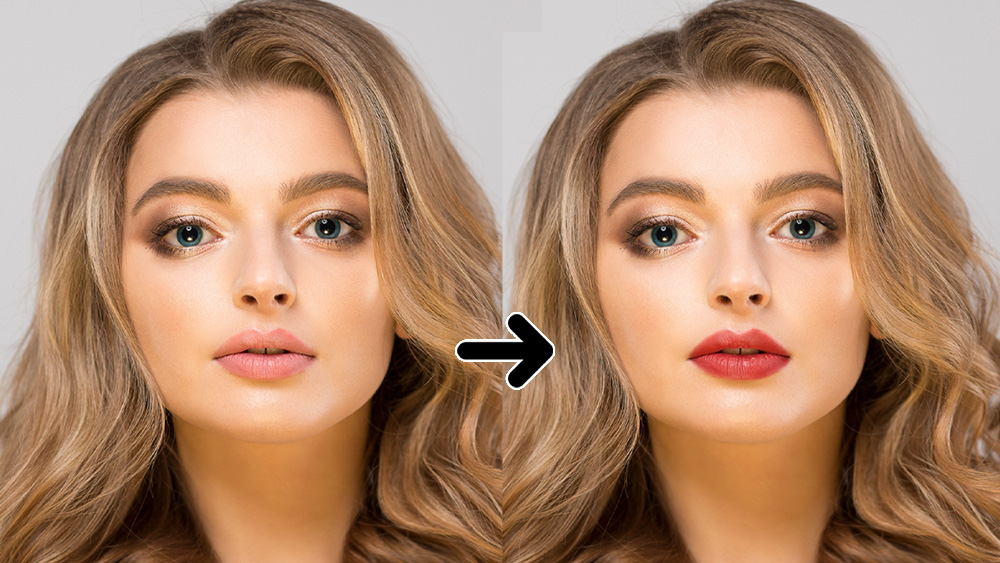
In this blog I’ll show you how to change the color of lips to create a lipstick effect in Adobe Photoshop.
Rather watch the video with instructions? Then click here or scroll down to the end of this page.
Click here to download the photo I used.
Step 1: Colorize lips
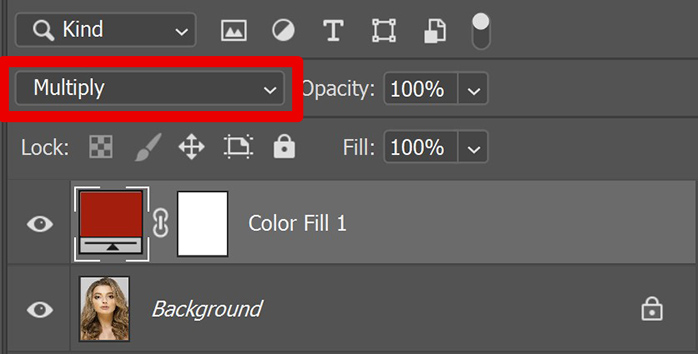
Open the photo you want to edit. Then create a solid color layer. Make it red.
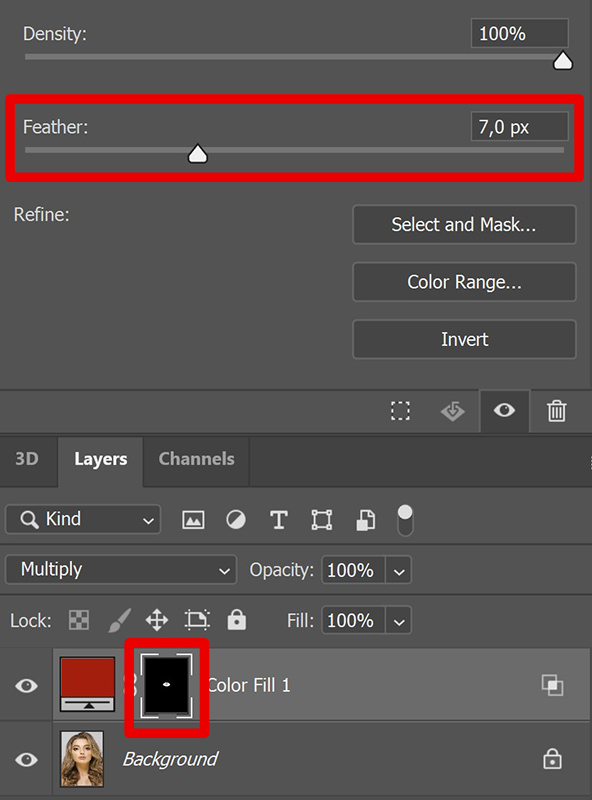
Change the blend mode of the color fill layer to multiply.
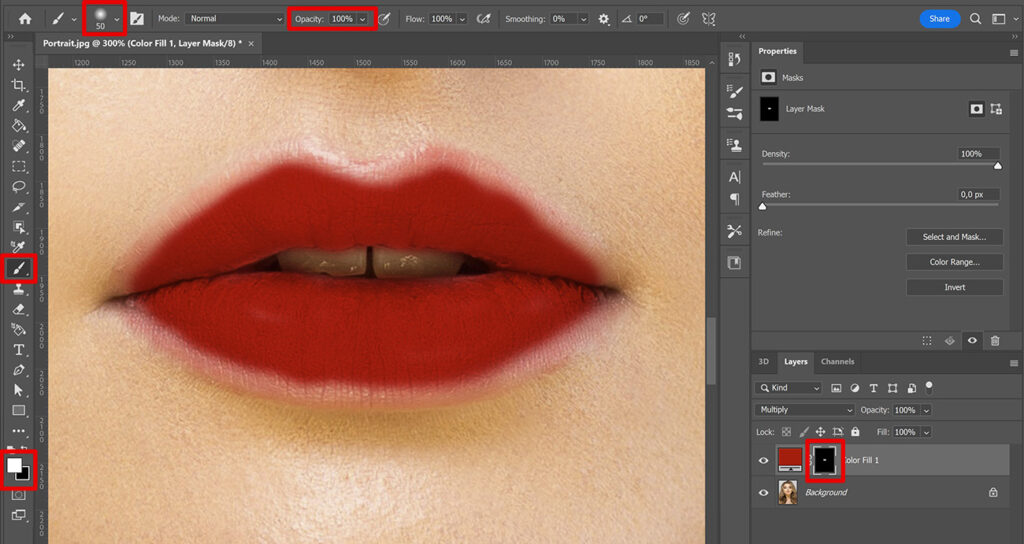
Then select the layer mask of the color fill layer. Navigate to ‘Image > Adjustments > Invert‘ or press CTRL+I. Your layer mask should now be black and you shouldn’t see the red color over your photo.
With the layer mask still selected, select the brush tool. I use a soft round brush, opacity 100%. Make the foreground color white and brush over the inside of the lips. The area you brush over should turn red now.
Tip: Use the [ and ] keys to adjust the brush size.
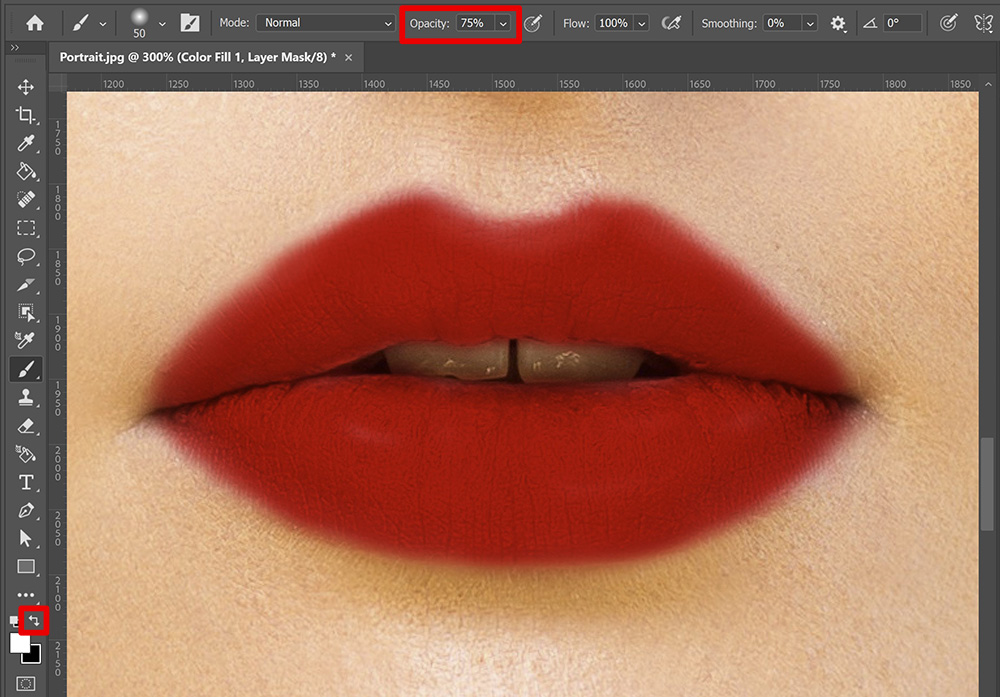
Then lower the opacity of the brush to 75% and brush over the edge of the lips.
If you accidentally brush over an area that shouldn’t be colored, change the foreground color to black and brush over it again. The color will be removed.
Step 2: Blend lipstick
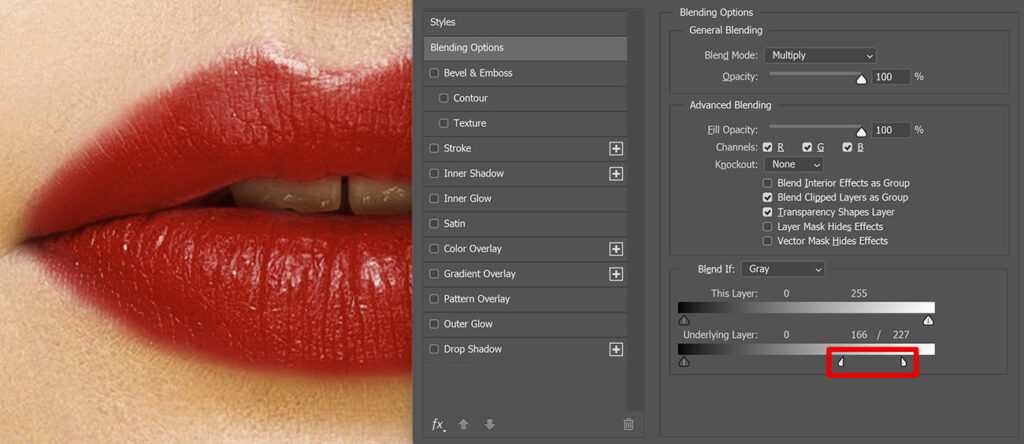
Select the color fill layer. Click on the fx icon below your layer panel and select ‘blending options‘.
Under underlying layer, drag the right slider to the left. Hold ALT and click on the slider to split it. Move the two parts until the color is blended with the lips.
Select the layer mask and increase the feather. By doing this, you’ll make the transition between the lipstick and the skin smoother.
If you want to make the transition between the lipstick and the skin even smoother, select the layer mask and the brush tool again. Lower the opacity of the brush to around 20% and make the foreground color black.
Then brush over the edge of the lipstick. You’ll now remove the color a little bit. Continue this until you’re happy with the result. Keep one thing in mind:
- Foreground color black = Remove color
- Foreground color white = Add color
If you want to make the lipstick a bit more subtle, lower the opacity of the color fill layer.
Step 3: Change lipstick color
If you want to change the color of the lipstick, double click on the thumbnail of the color fill layer. You can now adjust the color of the lips.
And that’s how you create lipstick in Adobe Photoshop!
I now showed you how to create lipstick, but you can also just add gloss to the lips. If you want to know how you can create glossy lips, read this blog.
Want to learn more about editing in Adobe Photoshop? Check out my other blogs or take a look at my YouTube channel.
Follow me on Facebook to stay updated! You can find the video with instructions below.
Photoshop
Basics
Photo editing
Creative editing
Camera Raw
Neural filters
Text effects