
Published on November 21, 2022
Blur background (Depth Blur)
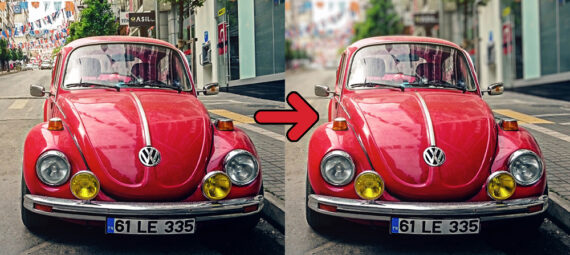
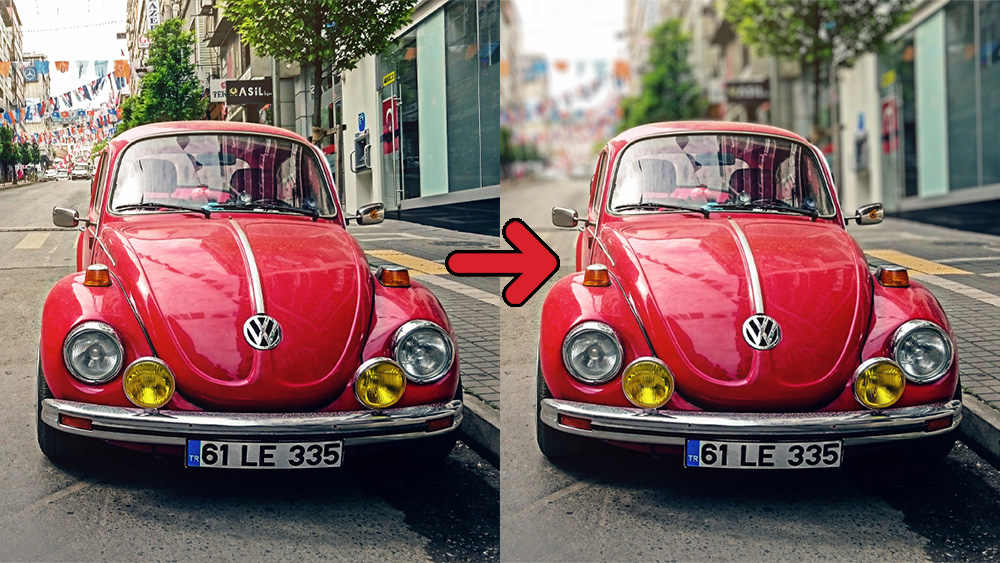
In this blog I’ll show you how to use the Depth Blur Neural Filter to blur your background in Adobe Photoshop.
Rather watch the video with instructions? Then click here or scroll down to the end of this page.
Click here if you want to download the photo I used.
Blur background
Open the photo you want to edit. Then navigate to ‘Filter > Neural filters‘.
Select the depth blur filter. There are a couple methods to determine which area will be sharp:
- Focal distance: If you adjust the focal distance, you’ll see that this changes the area that is sharp. The higher the amount, the further away the focus.
- Focal point: Click on the photo on the right to add a focal point. By doing this, you’re letting Photoshop know which area you want to be sharp.
- Focus subject: If you check the focus subject box, Photoshop will keep the subject sharp.
For this photo, I prefer using the focal point.
Adjusting the focal range will determine how much of the photo is blurred. A low amount will make a large area of the photo blurry, a higher amount will sharpen the photo more. You can compare this with depth of field. So adjust the settings until your subject is sharp.
You can then adjust the blur strength to make the background less or more blurry.

If you want, you can also add a haze to your background. In addition to that, you can also adjust the temp, tint, saturation, brightness and grain.
Output options
If you’re happy with the way it looks, you can apply these settings. Next to output, you’ll find these options:
- Current Layer: Applies the adjustments to the layer you’ve selected before opening the Neural Filters.
- New Layer: Creates a new layer with the adjustments.
- New Layer masked: Creates a new layer and applies the adjustments as a mask.
- Smart Filter: Applies the adjustments to the current layer as a smart filter.
- New Document: Opens the edited photo in a new document.
You can choose any option you want. Then click OK to apply the settings. And that’s how you blur your background with the Depth Blur Neural Filter in Adobe Photoshop!
Want to learn more about editing in Adobe Photoshop? Check out my other blogs or take a look at my YouTube channel.
Follow me on Facebook to stay updated! You can find the video with instructions below.
Photoshop
Basics
Photo editing
Creative editing
Camera Raw
Neural filters
Text effects