

Published on December 5, 2021
Create a dotted portrait (halftone effect)
In this blog I’ll show you how to quickly create a dotted portrait (halftone effect) in Adobe Photoshop.
If you’d rather watch the video tutorial of this process, click here or scroll down to the end of this page! Want to download the photo I used? Click here.
Step 1: Prepare image
First duplicate the background layer (press CTRL+J). Select the copy. Then navigate to ‘image > adjustments > desaturate‘ or press SHIFT+CTRL+U to convert this layer to black and white.
Add a ‘brightness/contrast‘ adjustment layer.
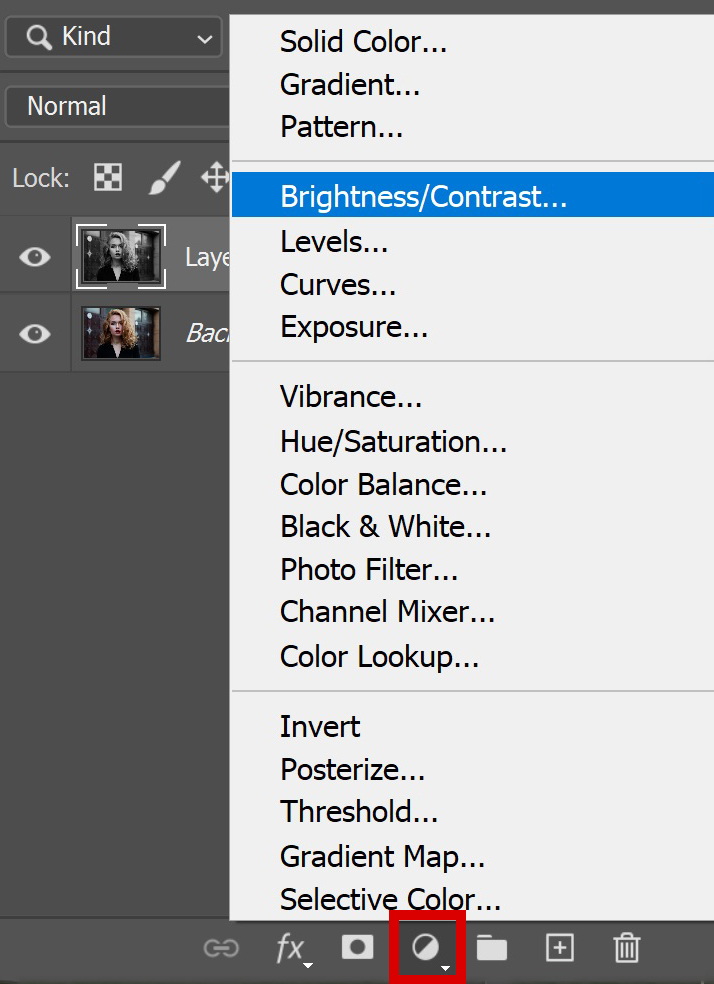
The image needs to have a lot of contrast. I increased the contrast to 80 and the brightness to 25. The exact settings depend on your image, it’s all good as long as there’s a lot of contrast between the dark and light areas.
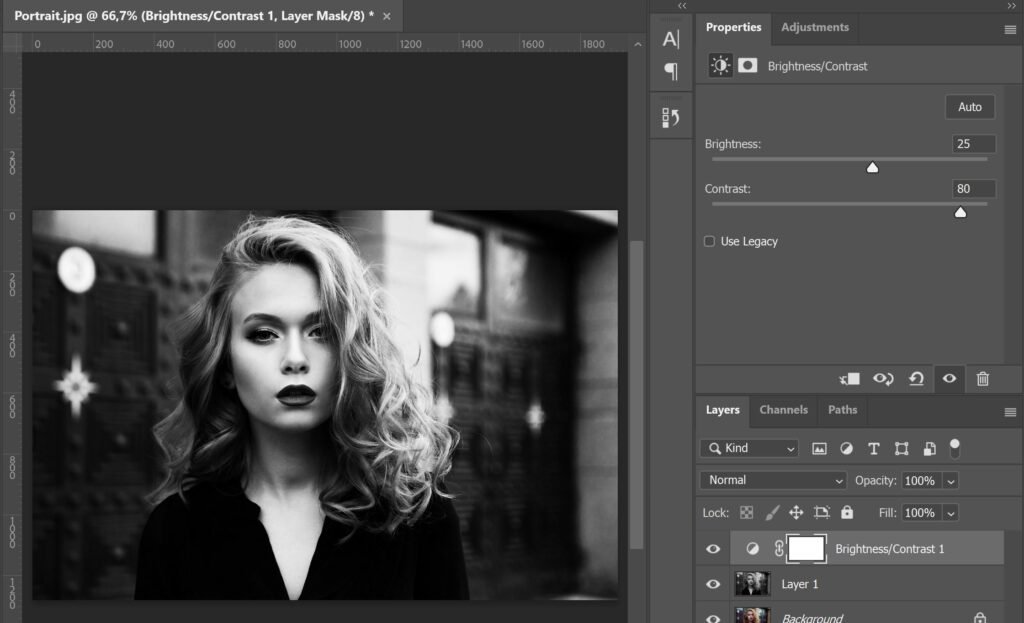
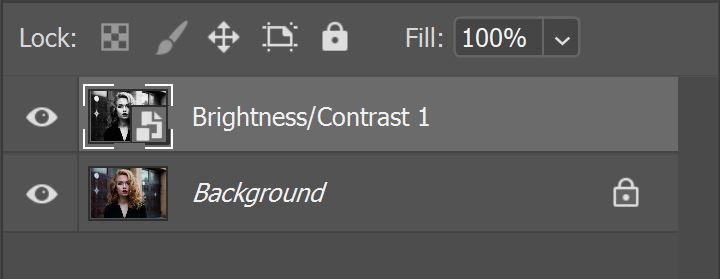
Select layer 1 and the brightness/contrast layer. Right click on it and select ‘merge layers‘. The brightness/contrast layer and layer 1 (the black and white layer) are now merged into one layer.
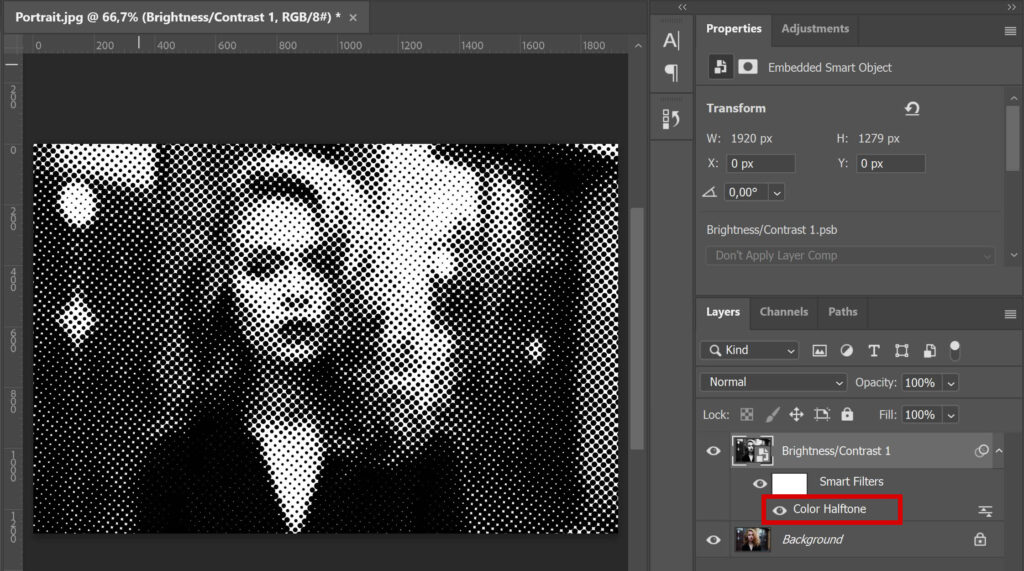
Select that new (merged) layer, right click on it and select ‘convert to smart object‘. It now looks like the image below: one layer with the smart object icon in the thumbnail.
Step 2: Dotted portrait
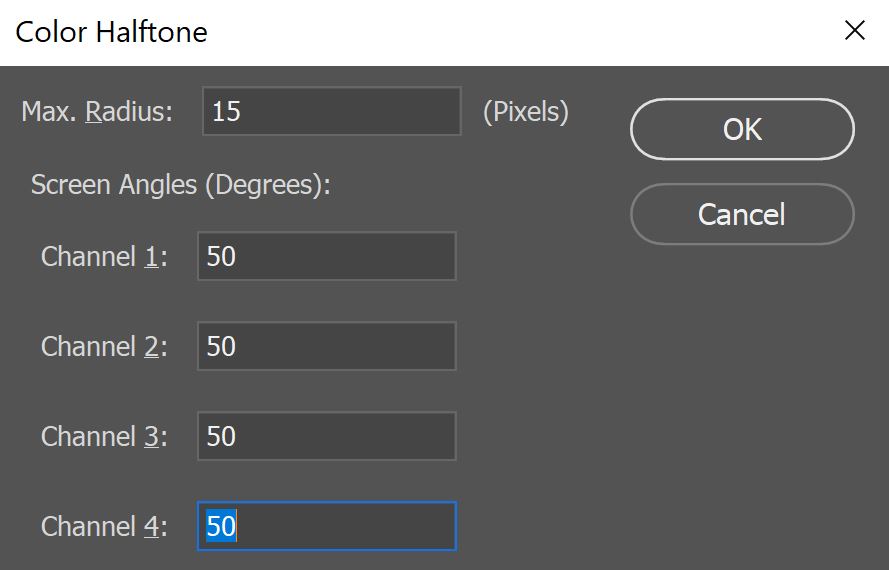
Now navigate to ‘filter > pixelate > color halftone‘. My max. radius is at 15 pixels and the rest at 50.
You can see the result in the image below. The result depends on the size of your image, so your result might look different from mine if you use the same settings.
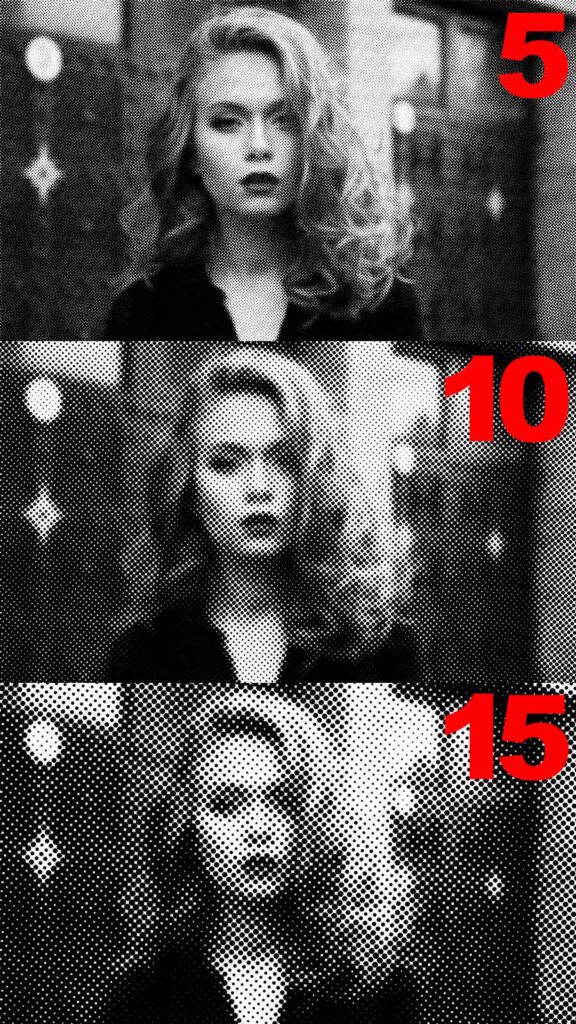
If you want to change the size of the dots, double click ‘color halftone’ in your layer panel. The ‘max. radius’ settings determine the size of your dots. To make the dots larger, increase the amount. To make them smaller, decrease the amount.
The image below shows an example of what it looks like with different ‘max. radius’ settings. As you can see, a max. radius of 5 pixels results in a much smaller dot than a max. radius of 15 pixels.
Try out some different settings to see what looks good on your image. If you’re working with a large file (in amount of pixels), you might have to use an even larger amount of pixels for the max. radius to create a good dot.
And that’s how you create this dotted portrait in Adobe Photoshop!
I now showed you how to create a black & white halfone dotted portrait. You can also create a colored mosaic dotted portrait. If you want to know more about that, read this blog I wrote about that.
Learn more about Photoshop
Want to learn more about Adobe Photoshop? Check out my other blogs or take a look at my YouTube channel. You can find the video tutorial below!
Photoshop
Basics
Photo editing
Creative editing
Camera Raw
Neural filters
Text effects