

Published on October 1, 2023
Change objects with Generative Fill
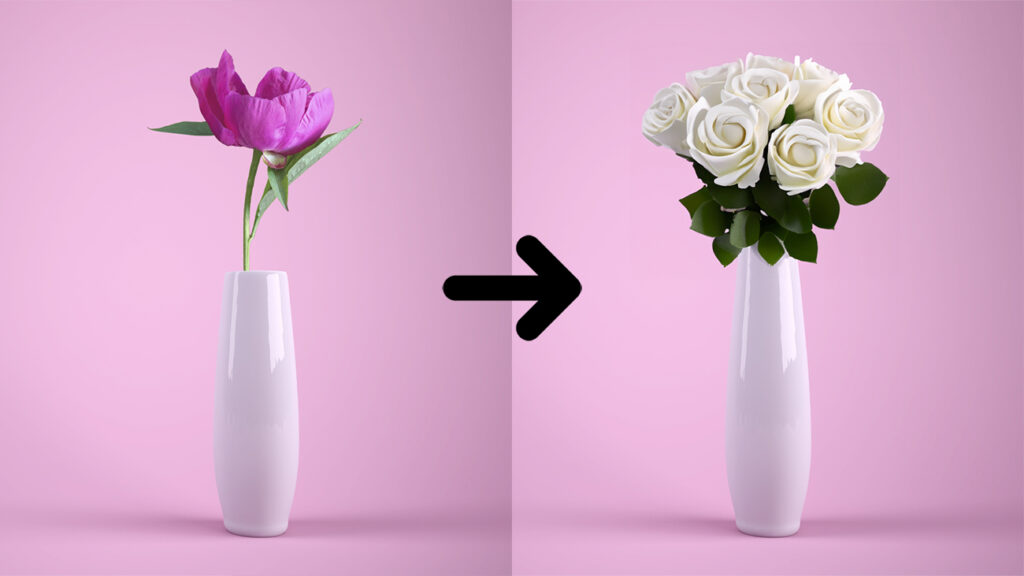
In this blog I will show you how to change or replace objects in your photo using Generative Fill in Adobe Photoshop.
Rather watch the video with instructions? Then click here or scroll down to the end of this page.
You can download the photo I used here.
Select and replace object
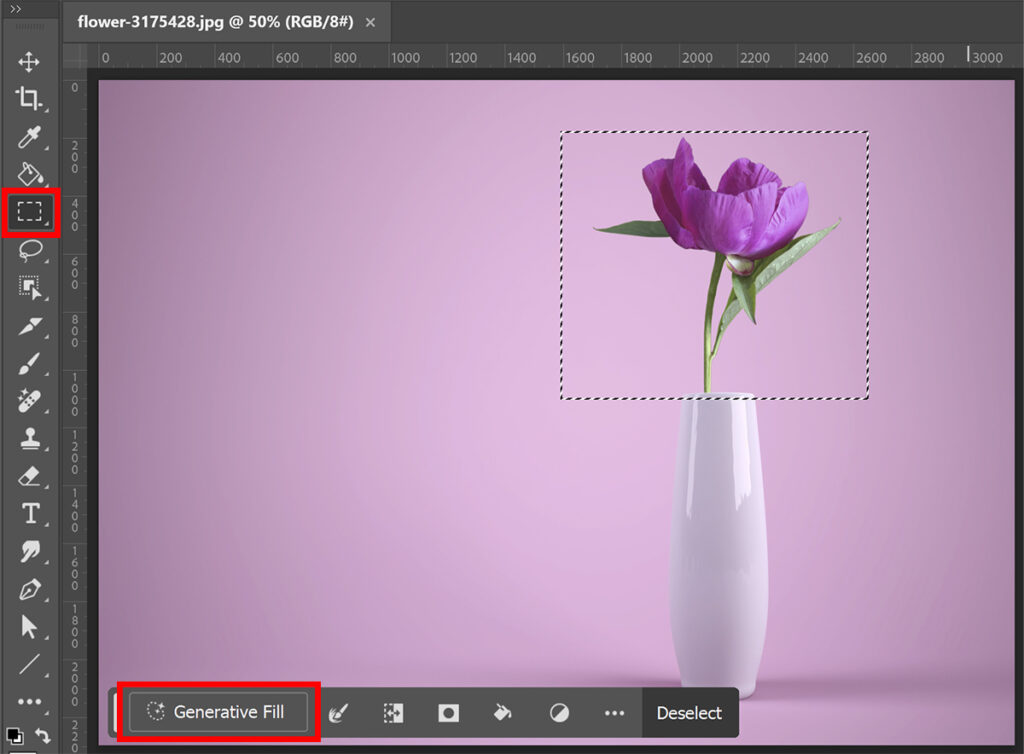
Before we start, it’s important that the contextual task bar is activated. You can activate it under ‘window‘ in the top menu bar.
Then select one of the selection tools to select the object you want to replace. I’m using the rectangular marquee tool, but you can also use another tool.
Select the object you want to replace and then select ‘generative fill‘.
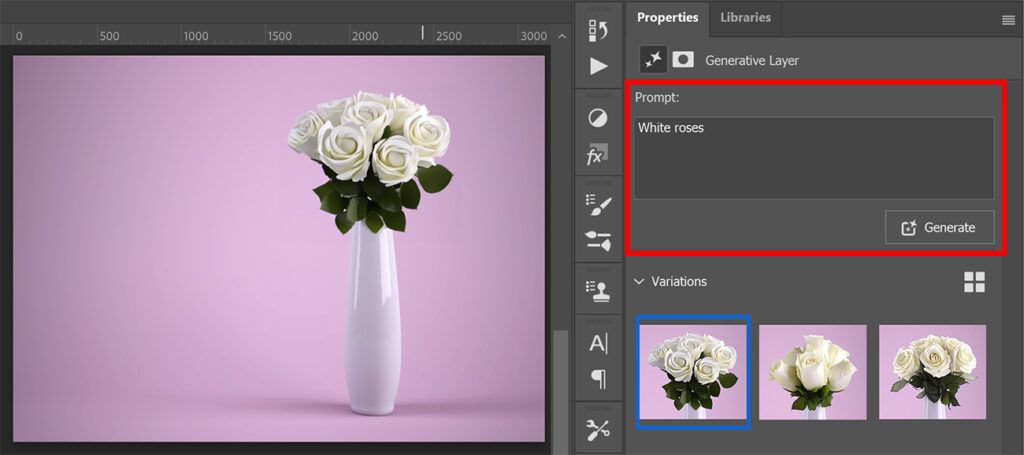
Type in what you want to generate. I want to change this flower into white roses. Then select ‘generate‘.

Photoshop will now give you 3 different variations. If you don’t like any of these variations, you can select ‘generate‘ again to get more variations. You can continue doing this until you find something that looks good!
You can also make the prompt more specific, give Photoshop as much information as possible! If you want to create something completely different, you can also change the prompt (to ‘yellow tulips’, for example).
And that’s how you replace something using Generative Fill in Adobe Photoshop!
Learn more about Photoshop
Check out my other blogs and my YouTube channel if you want to learn more about editing in Adobe Photoshop!
You can follow me on Facebook if you want to stay updated about new blogs and tutorials!
Photoshop
Basics
Photo editing
Creative editing
Camera Raw
Neural filters
Text effects