

Published on December 2, 2021
Chromatic aberration / anaglyph 3D effect
In this blog I’ll show you how to create a chromatic aberration or anaglyph 3D effect in Adobe Photoshop.
To download the image I’m using, click here.
Step 1: Prepare image
First you need to convert the image to black&white. Navigate to ‘image > adjustments > black&white‘ or use the shortcut ALT+SHIFT+CTRL+B. You can adjust the lightness of certain areas if you want (for example to make the skintones lighter and the background darker).
Now we need to duplicate the background layer. Select the background layer and press CTRL+J two times to duplicate it twice. I name the first layer ‘red’ and the second layer ‘blue’.

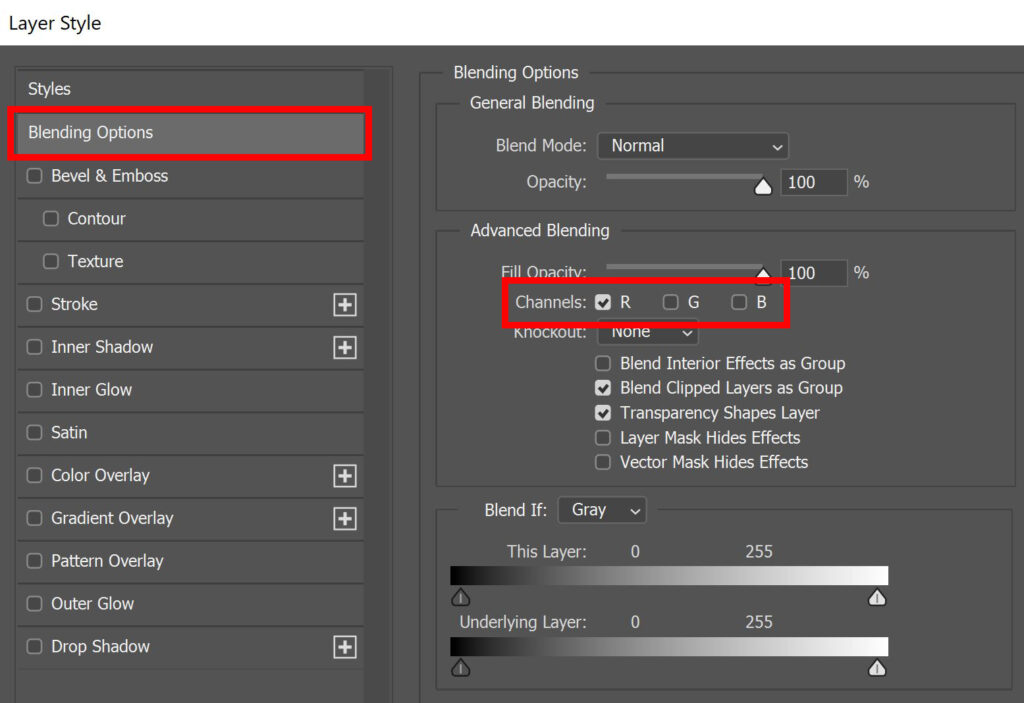
Double click on the ‘red’ layer. The layer style panel opens. Select ‘blending options‘, then deselect the G (green) and B (blue) next to ‘channels’ and only leave the R (red) selected. Then click OK.
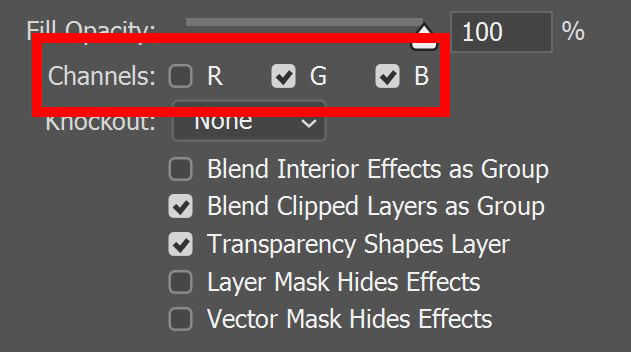
Now double click the ‘blue’ layer to open the layer style panel again. This time deselect the R and leave the G and B selected. Click OK.
Step 2: Chromatic aberration effect
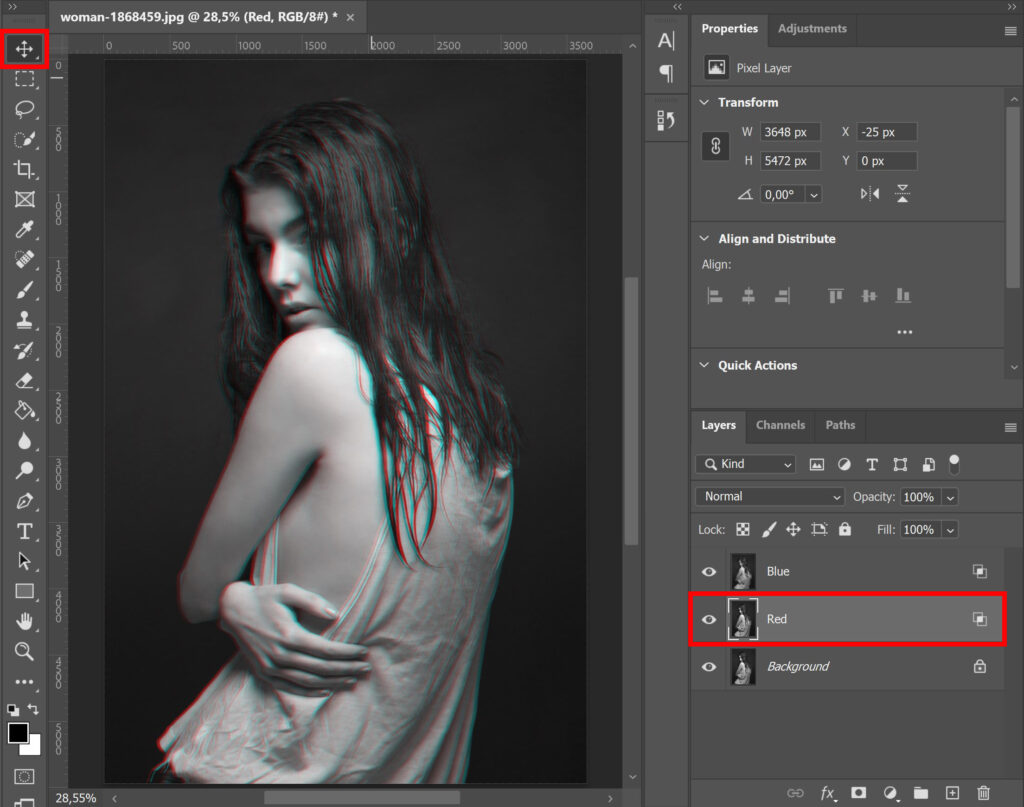
Select the ‘red‘ layer and select the move tool. Use the arrow keys to move this layer a little to the left. Tap the < arrow key a couple of times, you’ll see the red and blue colors appear.
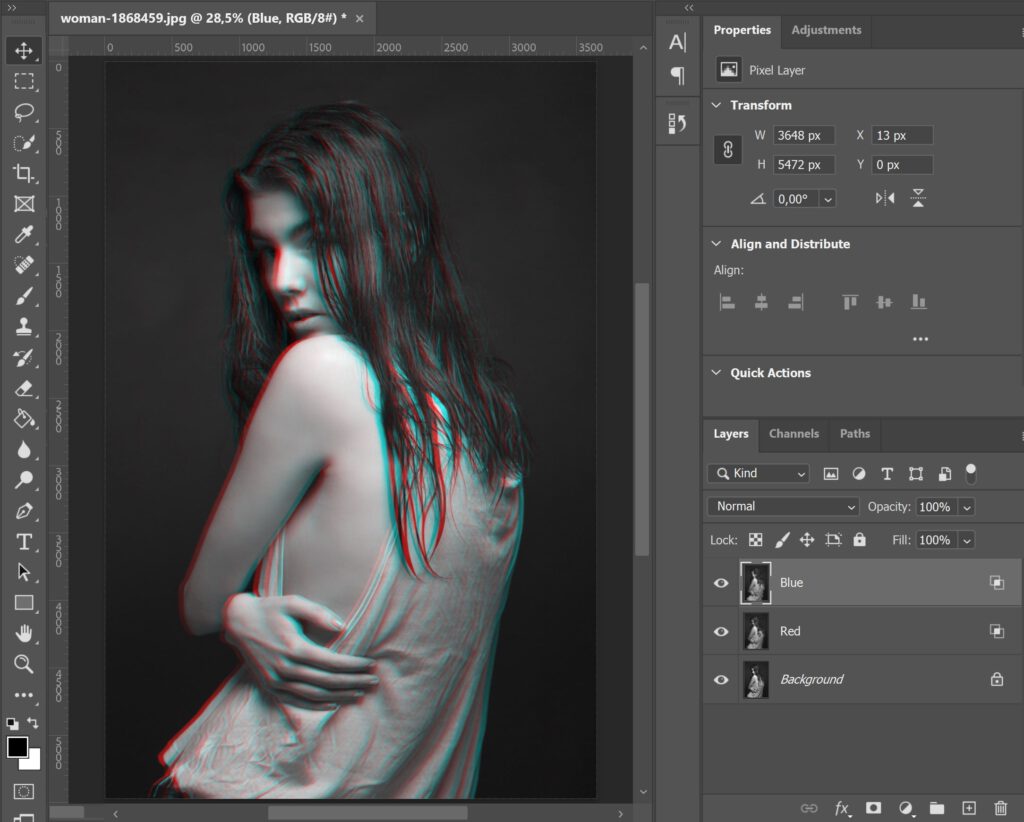
Then select the ‘blue‘ layer. You need to move this layer to the opposite side. So now use the > arrow key and tap it a couple of times to move the blue layer to the right. You can see the result in the image below.
Step 3: Refine effect
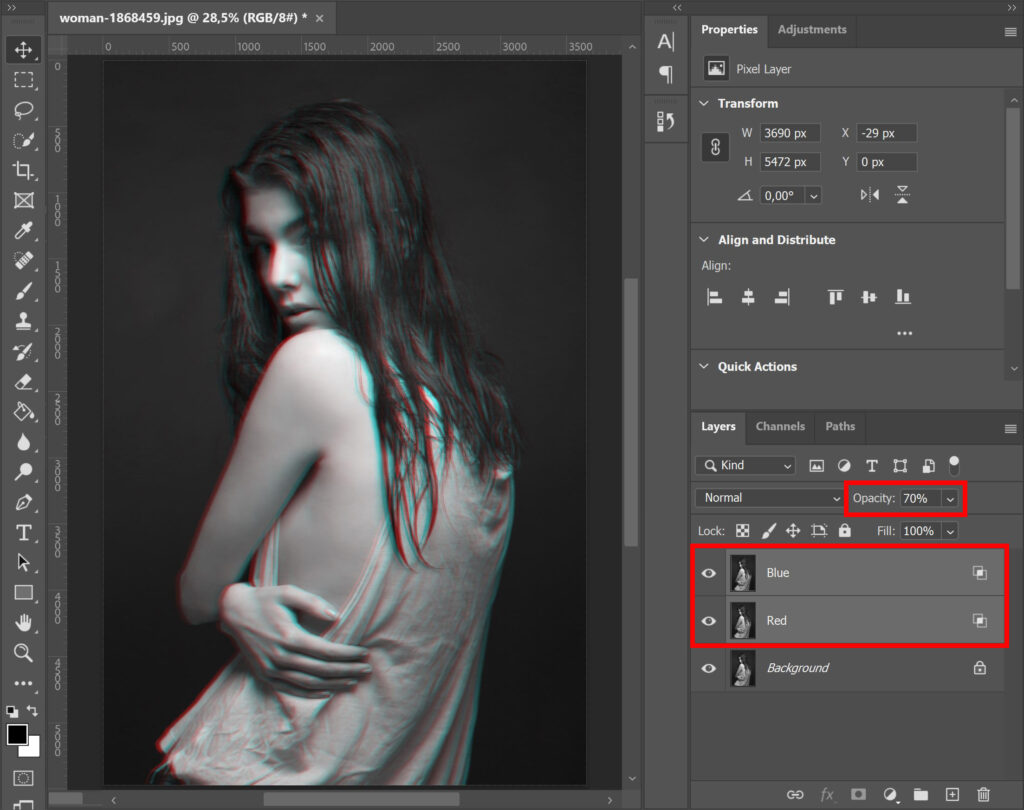
Want the effect to be more subtle? Select both the red and blue layer and lower the opacity. I lowered it to 70%.
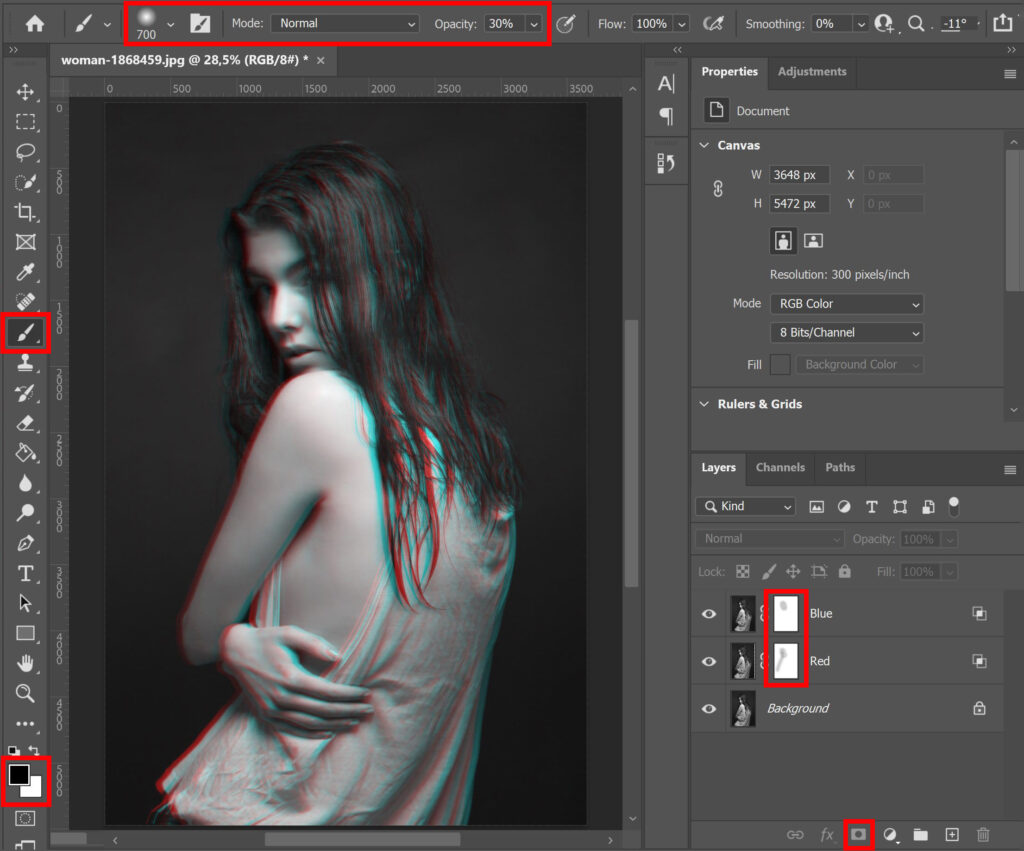
If you only want to make the effect more subtle in certain areas, the face for example, add a layer mask to the red and/or blue layer. Select the brush tool, I prefer using a soft round brush. Lower the opacity to around 30% and make the foreground color black.
Select the layer mask and brush over the areas where you want the effect to be less prominent. Do this for both the red and blue layer (if you added a layer mask to both layers).
And that’s how you create a chromatic aberration effect in Adobe Photoshop!
Learn more about Photoshop
Want to learn more about Adobe Photoshop? Check out my other blogs or take a look at my YouTube channel.
Photoshop
Basics
Photo editing
Creative editing
Camera Raw
Neural filters
Text effects