
Published on October 21, 2022
Blur background
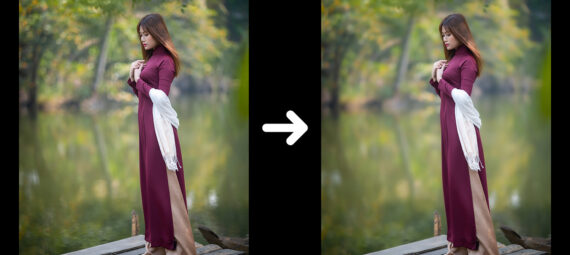
In this blog I’ll show you how to smoothen or blur your background in Adobe Lightroom (Classic).
If you’d rather watch the video with instructions, click here or scroll down to the end of this page.
This is a good method to make your background a bit smoother, but it won’t drastically blur your background. If you’re able to use Photoshop, I’d suggest you use that if you want to make the background really blurry. Want to know how? Read these blogs:
If you want to download the photo I used, click here.
Step 1: Select background
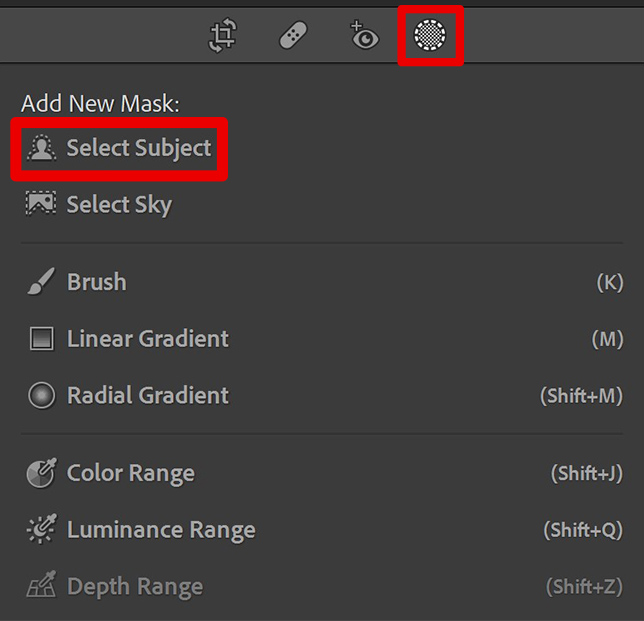
Open the photo you want to edit. Select ‘masking‘ and then select ‘select subject‘. Lightroom will now select your subject.
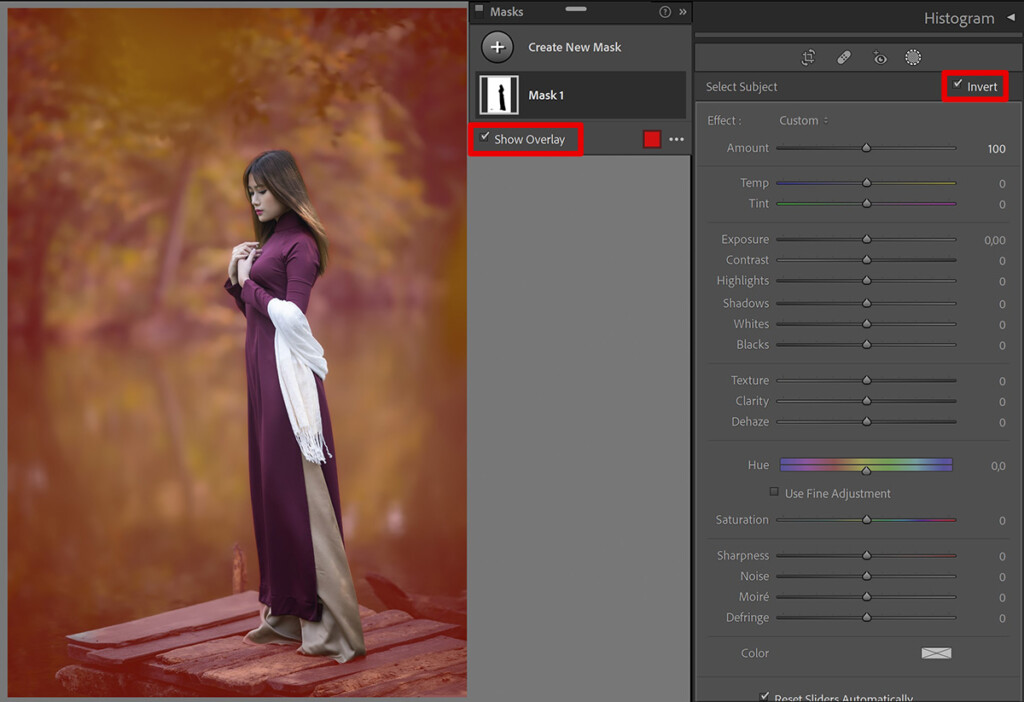
If you select ‘show overlay‘ (or press O) you can see the masked area. You don’t want to mask your subject, you want to mask your background. To do that, select ‘invert‘. The masked area will be blurred and the rest will stay sharp.
Step 2: Blur background
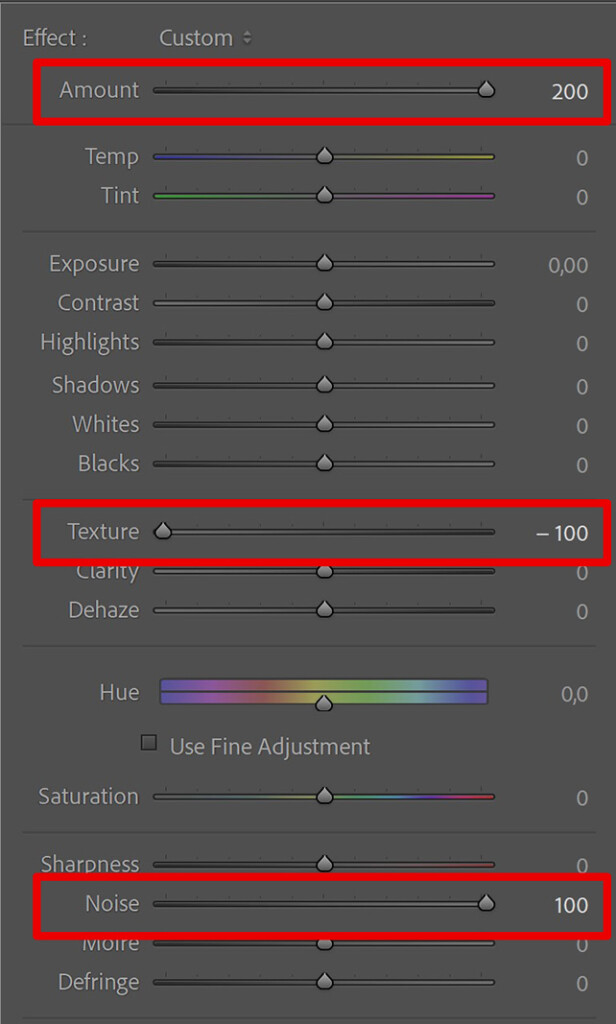
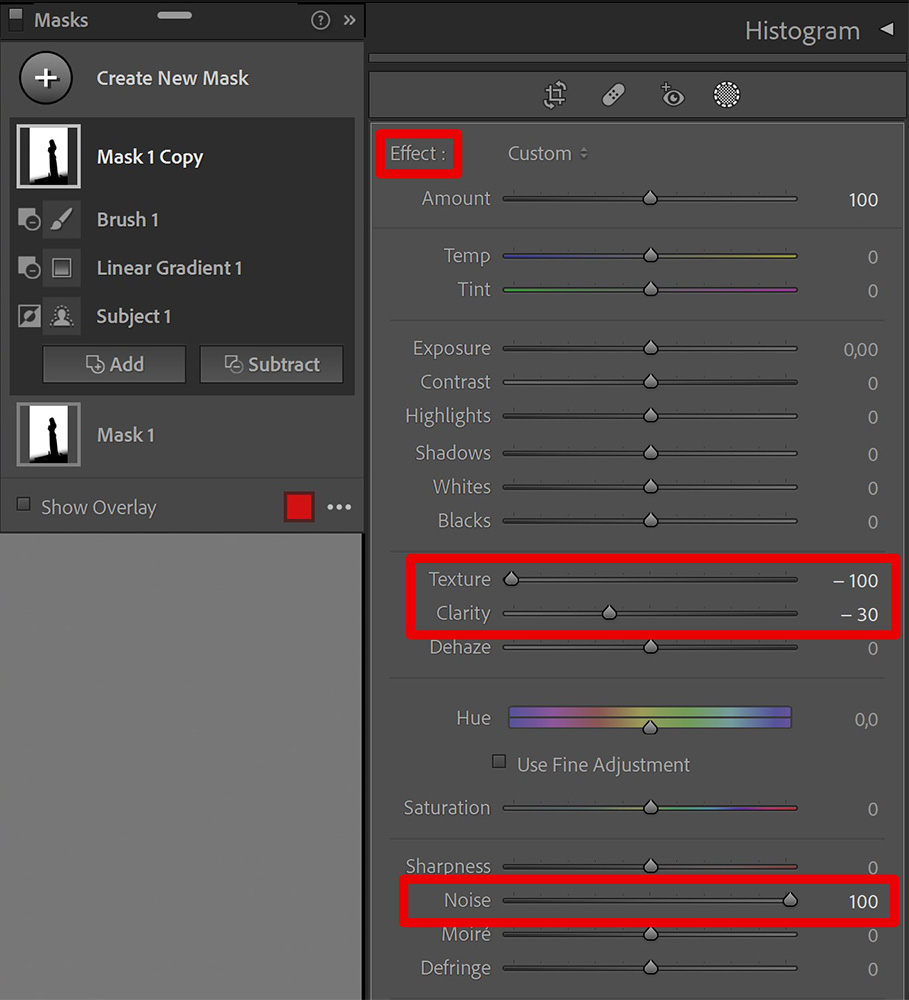
To blur the background, I decrease the texture and I increase the noise (this removes the noise). To make it smoother, you can also increase the amount.
Step 3: Adjust mask
The foreground of my photo (the jetty) is blurred too now. I don’t want that area to be blurry though, so I need to adjust the masked area.
To do that, select ‘subtract‘ and select a tool to subtract with. I use the linear gradient now, but you can use any tool you like.
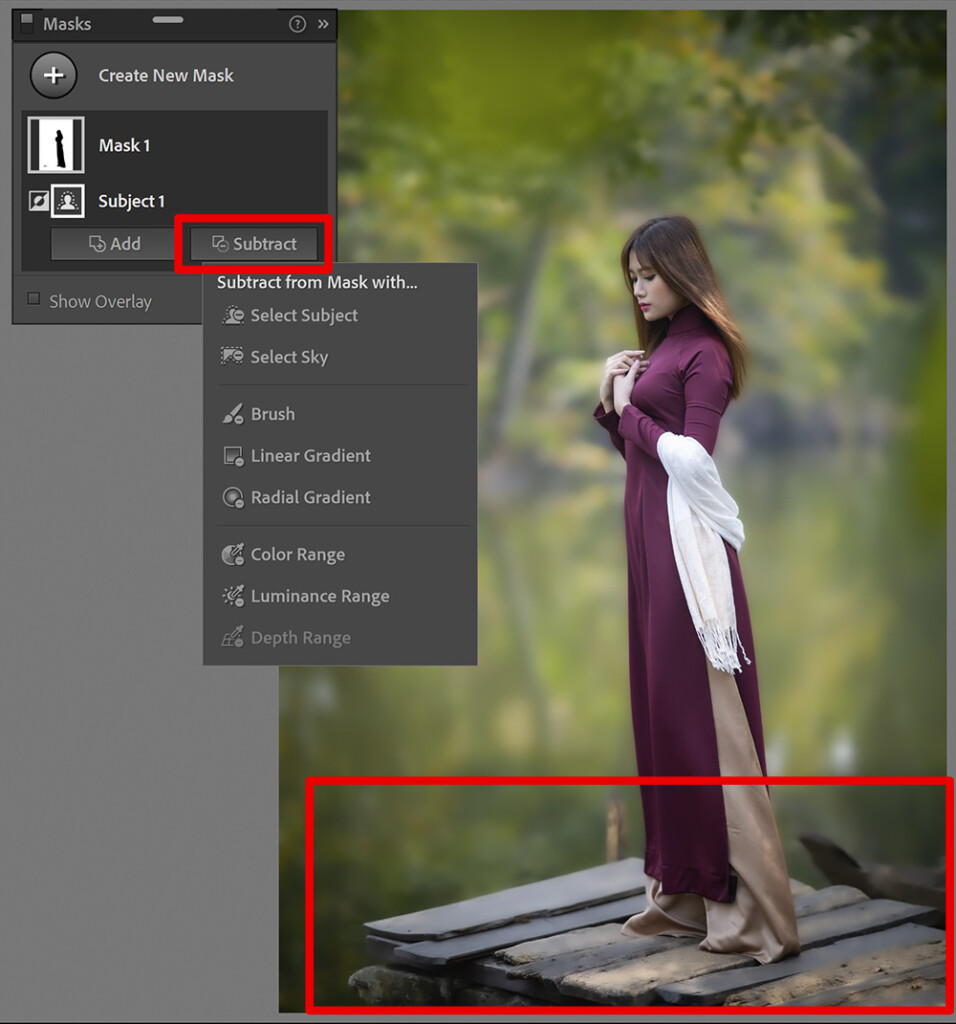
Remove the mask from the area you don’t want to blur. You can also use multiple tools to do this. I remove the blur from the jetty with the linear gradient tool and then I use the brush tool for some touch ups. Sometimes the edge of your subject (or the hair) gets a bit blurry too. You can use the brush tool to remove that too (zoom in to get a good look).
You can also add something to your mask by selecting ‘add’ instead of ‘subtract’.
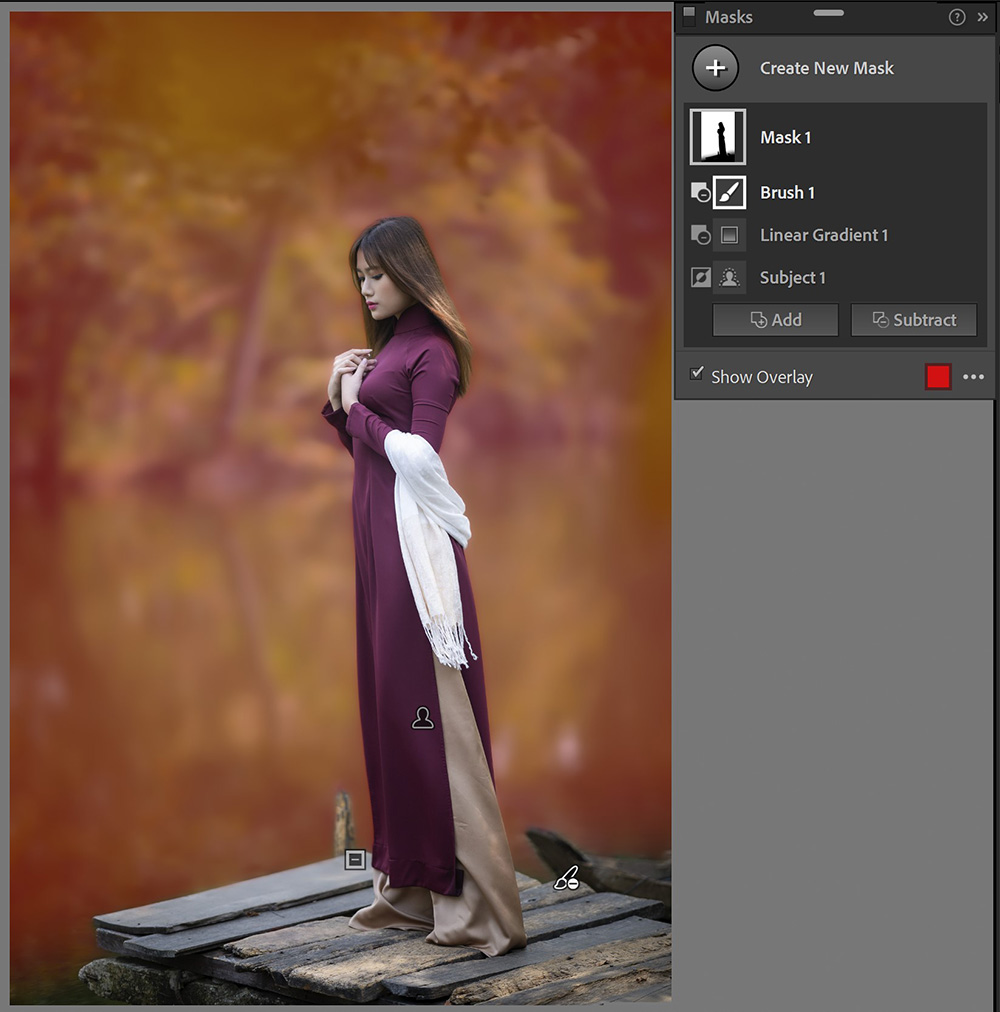
To show the masked area, select ‘show overlay’ or press O.
Step 4: Blur background more
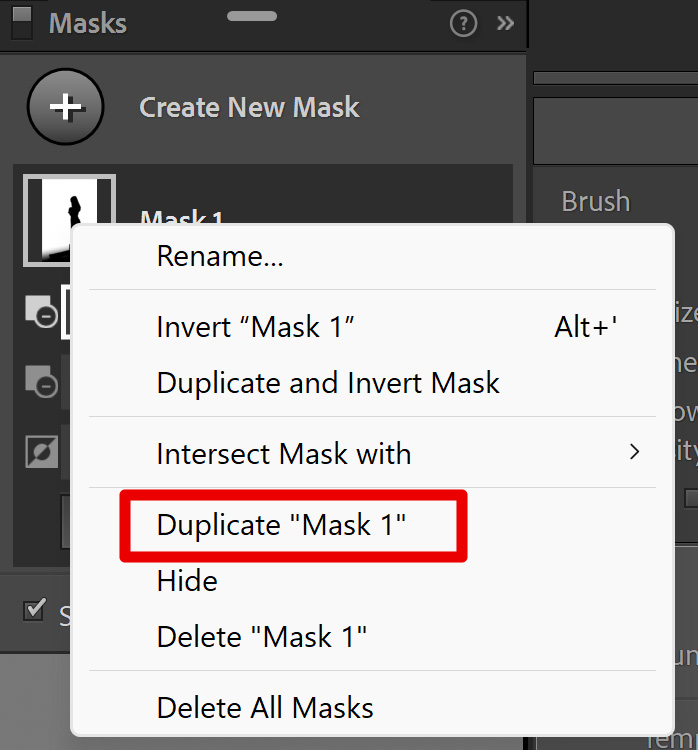
To make the background blurrier, you can also decrease the clarity. This might not look good with the amount of this mask at 200 though. Decreasing the clarity may result in a weird glow around your subject.
So instead right click on the mask and duplicate it.
Double click on effect to reset the settings. You can now decrease the clarity a bit to smoothen the background. You can also adjust the texture and noise again.
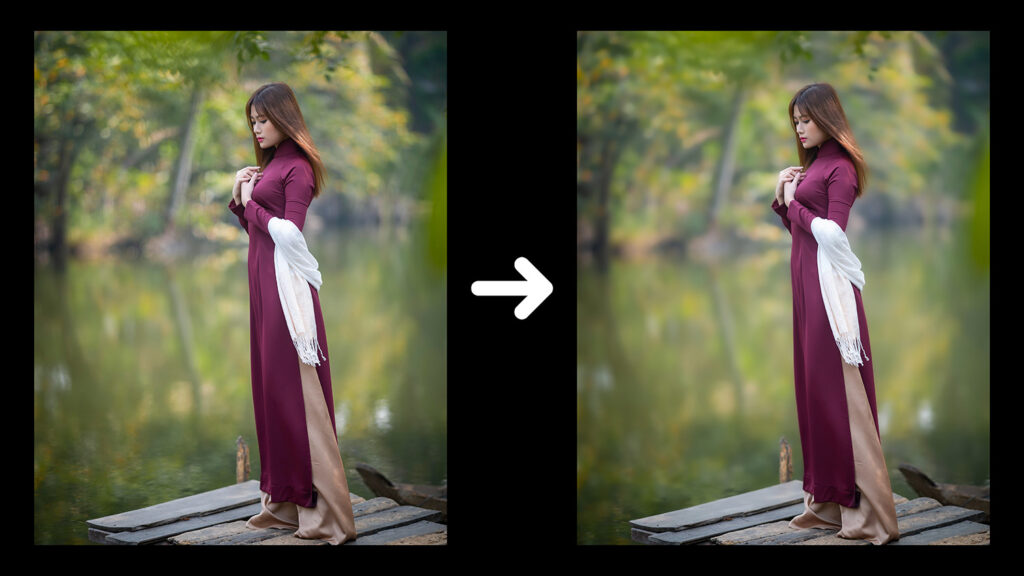
And that’s how you smoothen or blur your background in Adobe Lightroom. As said, this method is good to create a subtle blur. You can see the result below!
Want to learn more about editing in Adobe Lightroom? Check out my other blogs or take a look at my YouTube Channel.
Also follow me on Facebook to stay updated! You can find the video with instructions below.
Photoshop
Basics
Photo editing
Creative editing
Camera Raw
Neural filters
Text effects